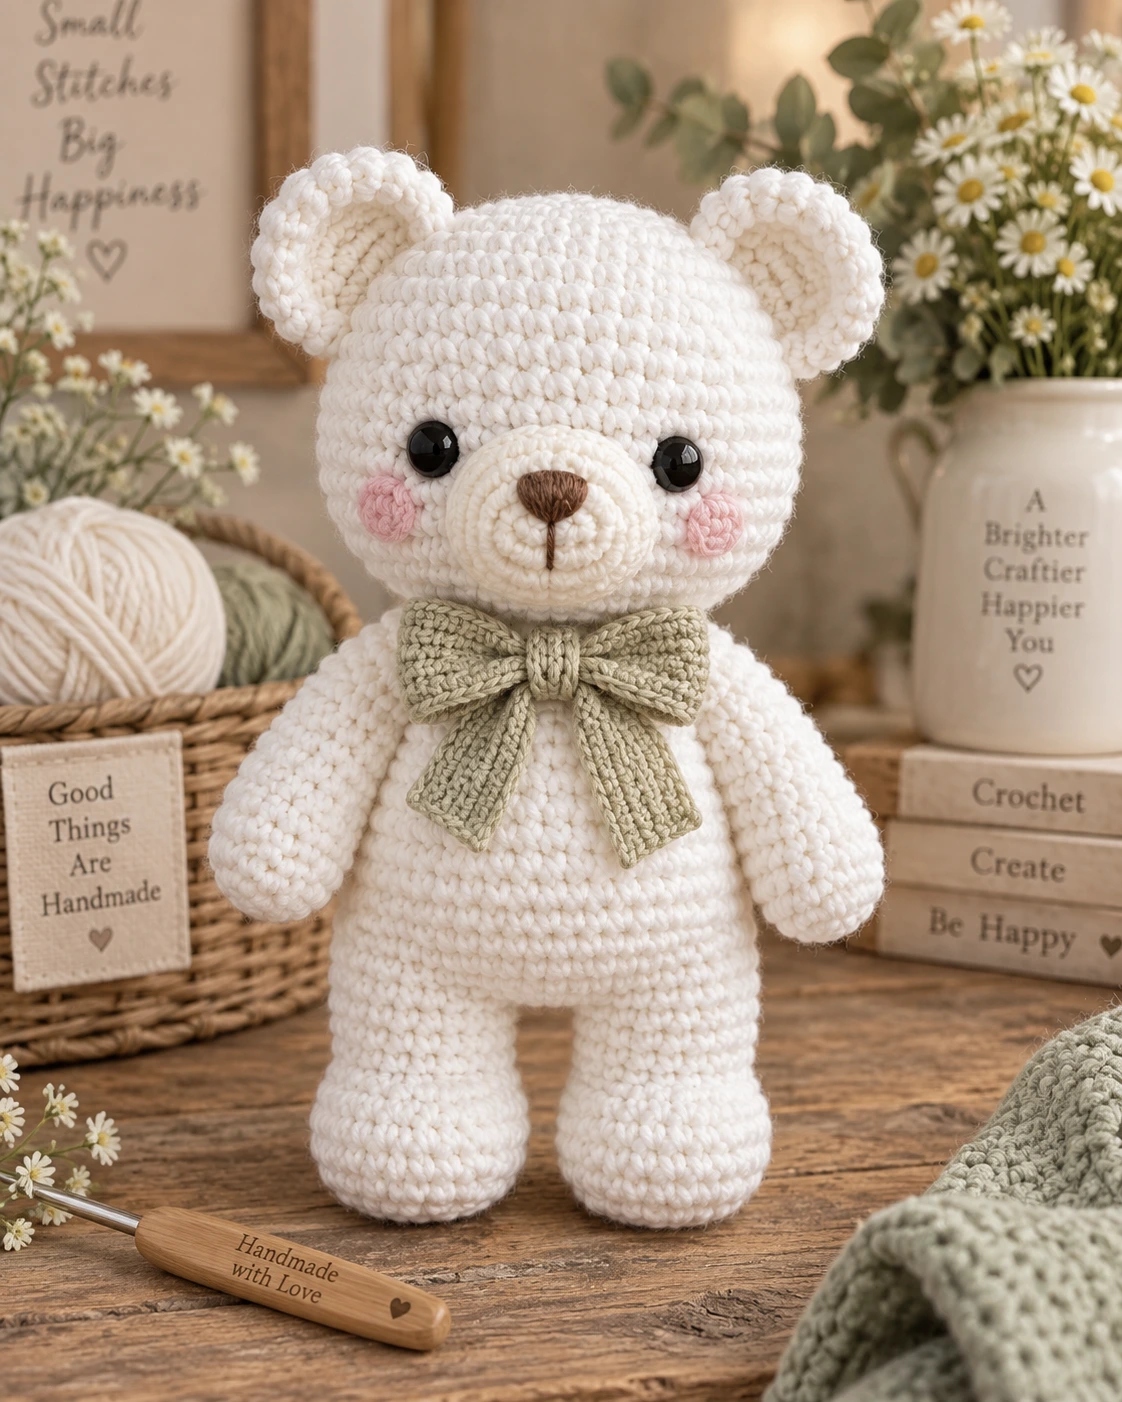
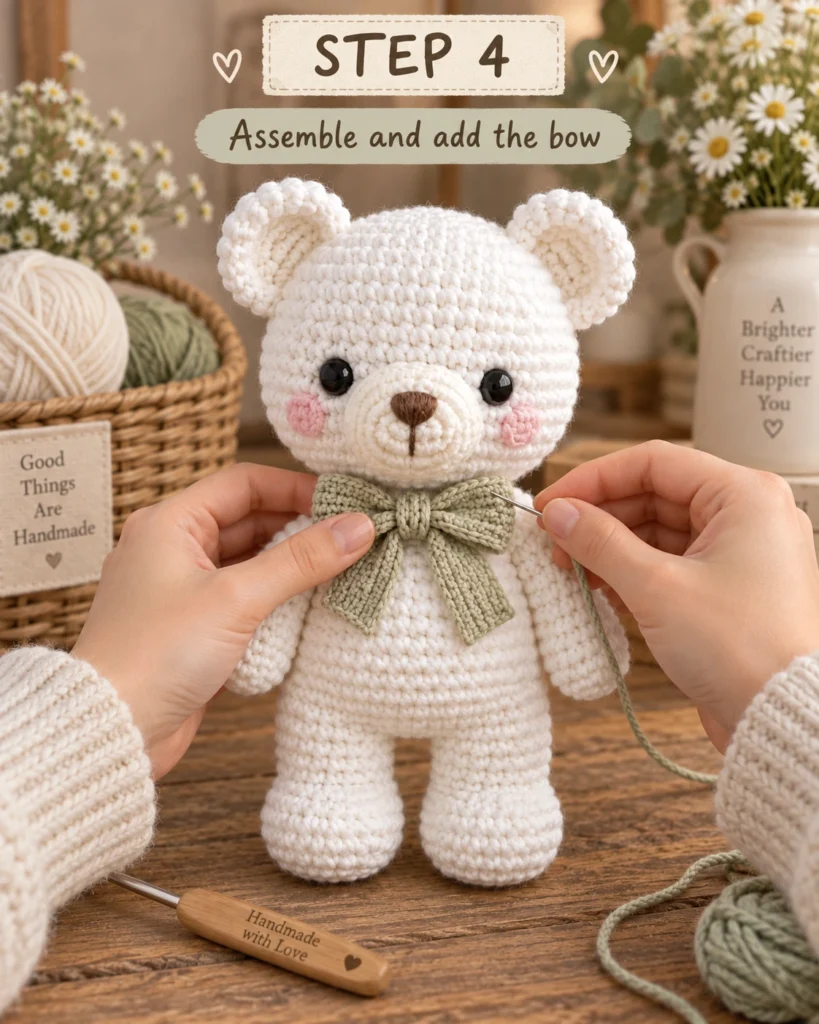
This sweet white crochet bear is a soft, elegant amigurumi project with a simple handmade look. The creamy white body, round ears, rosy cheeks, small brown nose, and sage-green bow give it a clean and cozy style that works beautifully for gifts, nursery decor, handmade markets, or your own crochet collection.
The bear is made in separate pieces and assembled at the end, which makes the project easier to manage. If you are comfortable with basic amigurumi techniques such as working in rounds, increasing, decreasing, stuffing, and sewing pieces together, you should be able to follow this pattern.
Why You’ll Love This Crochet Bear
This design is simple but polished. It has a classic teddy-bear shape without too many complicated details, and the soft neutral colors make it suitable for many occasions.
It is also easy to customize. You can change the bow color, make the bear larger or smaller, embroider the eyes instead of using safety eyes, or add a tiny scarf, flower, or heart.
Materials You’ll Need
For this project, prepare:

YOUR COMPLETE RECIPE COLLECTION
Stop Searching for Meal Ideas—Get 50+ Delicious Recipes in One E-Book
Get the complete recipe e-book and discover delicious meal ideas collected in one convenient place.
Discover All 50+ Recipes- White cotton or cotton-blend yarn
- Small amount of cream or ivory yarn for the muzzle
- Sage-green yarn for the bow
- Brown embroidery thread or yarn for the nose
- Pink yarn for the cheeks
- Black safety eyes or black embroidery yarn
- Crochet hook suitable for your yarn
- Fiberfill stuffing
- Yarn needle
- Stitch markers
- Scissors
- Sewing pins
For a firm amigurumi texture, use a crochet hook slightly smaller than the size normally recommended for your yarn.
Crochet Abbreviations
This pattern uses standard US crochet terms:
MR – magic ring
sc – single crochet
inc – increase
dec – decrease
sl st – slip stitch
ch – chain
st/sts – stitch/stitches
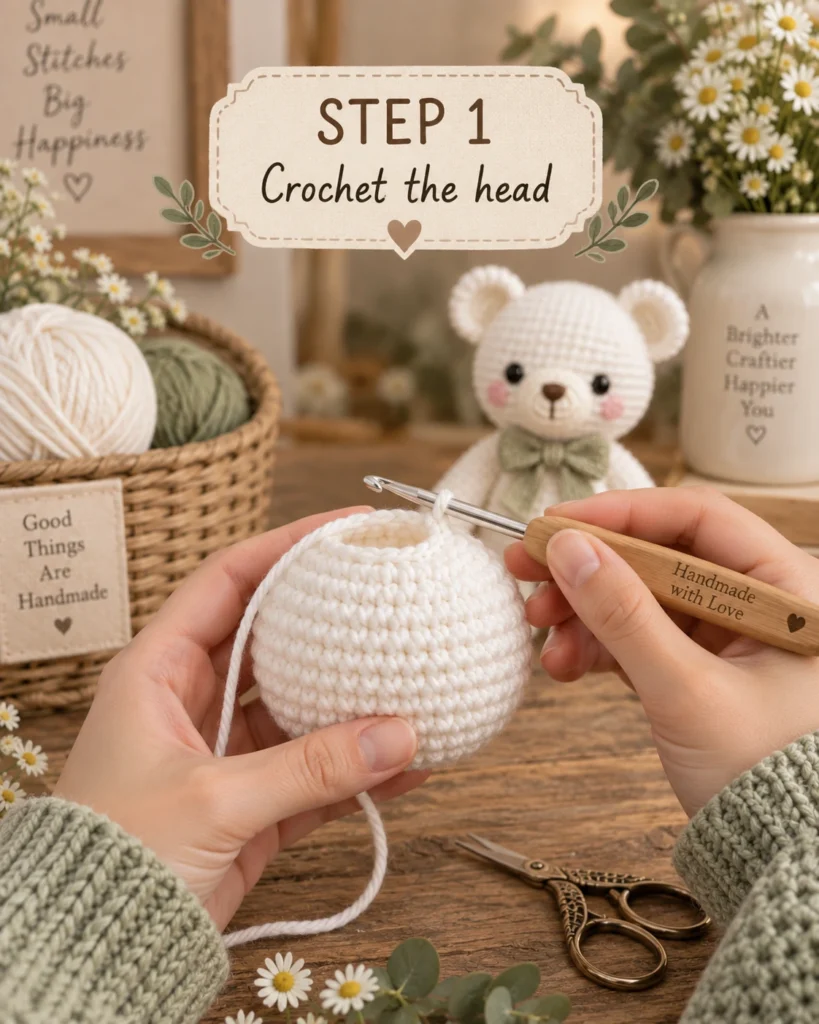
Step 1: Crochet the Head
Begin with white yarn.
Make a magic ring and work your first round of single crochet stitches into the ring.
Increase evenly over the next several rounds until you have a flat circle large enough for the widest part of the head.
Once the head reaches the desired width, stop increasing and crochet several rounds evenly.
The piece will begin to curve into a sphere.
Before you start decreasing, decide where the eyes will go. If you are using safety eyes, insert them while the inside of the head is still accessible.
Begin decreasing gradually.
Stuff the head firmly as you work, adding small amounts of fiberfill at a time.
Continue decreasing until the opening is small enough to close.
Fasten off and weave in the yarn end.
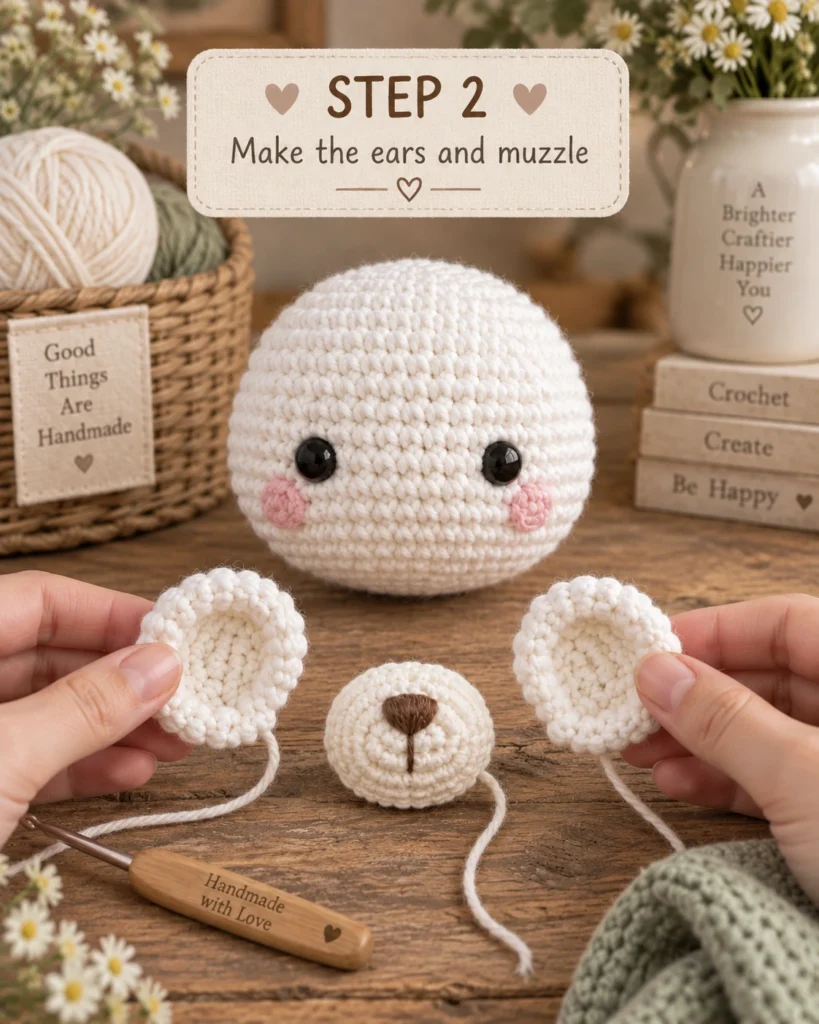
Step 2: Make the Muzzle
Using cream or ivory yarn, make a small flat circle or oval.
Start with a magic ring and increase until the muzzle is wide enough for the center of the face.
Keep it slightly raised but not overly bulky.
Using brown yarn, embroider a small triangular nose in the center.
Add a short vertical line beneath the nose, then make two small curved stitches to form the mouth.
Position the muzzle between and slightly below the eyes.
Pin it in place before sewing so you can check the alignment.
Sew around the edge with matching yarn.
Step 3: Add the Cheeks
Using pink yarn, crochet two very small circles or embroider circular blush details directly onto the face.
Position them beneath the eyes, one on each side of the muzzle.
Keep them subtle so they complement the soft design.
What Makes This Pattern Special
The charm of this bear comes from its simple proportions and soft color palette.
The white yarn gives it a clean, classic appearance, while the sage bow adds just enough contrast to make the design distinctive.
Because the shape is intentionally simple, the same pattern can be reused for many different themes. A pink bow creates a sweet nursery bear, a red bow creates a Christmas version, and a blue or beige bow makes it suitable for everyday decor.
Step 4: Crochet the Ears
Make two matching ears using white yarn.
Start with a magic ring and increase until you have a small circular piece.
You can keep the ears flat or crochet an extra round for a slightly fuller shape.
Do not stuff them heavily.
Fold or shape them gently with your fingers.
Position the ears on the upper sides of the head.
Make sure both ears are at the same height before sewing.
Use white yarn and small stitches to attach them securely.
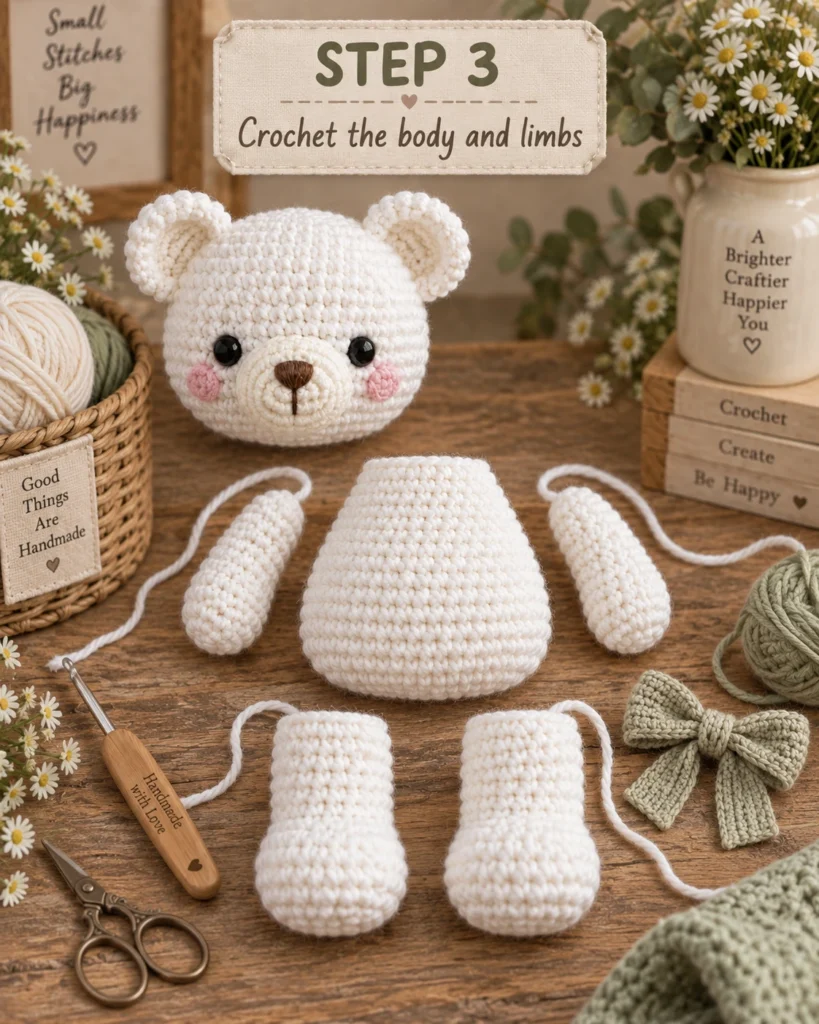
Step 5: Crochet the Body
Using white yarn, make a magic ring.
Increase gradually until the base is wide enough.
Continue crocheting without increases to form the lower body.
For a teddy-bear shape, keep the lower portion slightly wider than the upper portion.
Begin decreasing slowly as you approach the neck.
Stuff the body as you work.
Keep the stuffing evenly distributed so the finished bear feels firm but soft.
Close the top and leave a long yarn tail for attaching the head.
Step 6: Crochet the Arms
Make two arms using white yarn.
Begin each arm with a magic ring.
Increase slightly to create a rounded paw.
Crochet several rounds evenly to create the arm length.
You can add a small amount of stuffing to the lower portion of the arm while leaving the upper portion softer.
Decrease slightly near the top if needed.
Fasten off and leave a long tail for sewing.
Make the second arm the same way.
Step 7: Crochet the Legs
The legs should be slightly wider than the arms.
Begin with a magic ring and increase to form the foot.
Continue crocheting to create a rounded lower leg.
Work several rounds evenly.
Stuff each leg firmly, especially around the feet, so the bear can stand or sit more naturally.
Finish both legs and leave long yarn tails for sewing.
Step 8: Assemble the Body
Position the legs at the lower part of the body.
Pin them before sewing to make sure they are even.
Attach each leg securely using the yarn tails.
Next, place the arms on either side of the upper body.
Check that they sit at the same height.
Sew them firmly in place.
Finally, position the head on top of the body.
Use the long body yarn tail to sew around the neck several times.
Make sure the head is secure and straight.
Step 9: Crochet the Sage Bow
Using sage-green yarn, crochet a small rectangle.
You can work back and forth in rows using single crochet or half double crochet.
Once the rectangle reaches the desired size, fasten off.
Pinch the center of the rectangle together.
Wrap yarn around the middle several times to create the bow shape.
For the long ribbon ends, crochet two narrow strips and attach them behind the bow.
Alternatively, make one longer strip and fold it to create both tails.
Secure everything with a yarn needle.
Step 10: Attach the Bow
Place the bow directly beneath the bear’s head.
Center it carefully.
Use sage yarn and a yarn needle to sew through the center of the bow and into the body.
Add a few hidden stitches behind the loops and ribbon tails so the bow does not move.
Try not to flatten the bow while sewing.
Expert Tips for Success
Keep your stitch tension consistent. This is especially important with white yarn because uneven stitches can be more noticeable.
Stuff the head gradually and shape it with your hands as you work.
Use stitch markers to keep track of the beginning of each round.
Before attaching any pieces permanently, pin everything in place and inspect the bear from the front, side, and back.
For a softer facial expression, place the eyes fairly close to the muzzle rather than too far apart.
If the neck feels unstable, add several extra sewing passes between the head and body.
Easy Variations
This basic white bear can be adapted in many ways.
Try a dusty pink bow for a softer look, a blue bow for a classic nursery style, a red bow for Christmas, or a lavender bow for spring.
You can also add embroidered eyelashes, a crochet flower near one ear, a tiny scarf, a heart appliqué, or a small personalized initial.
For a more rustic look, use cream yarn instead of pure white.
Safety Note
If you are making the bear for a baby or very young child, consider embroidering the eyes and nose instead of using plastic safety eyes.
Check every seam carefully and make sure all decorative pieces are securely attached.
Frequently Asked Questions
Is this crochet bear suitable for beginners?
Yes, especially for beginners who already understand basic single crochet, increasing, decreasing, and working in rounds.
What yarn is best?
Cotton and cotton-blend yarns are great choices because they produce clear stitches and a structured finished bear. Soft acrylic yarn can also work.
Can I make the bear larger?
Yes. You can use thicker yarn and a larger hook, or add more increase rounds to the main pieces.
Can I make the bow removable?
Yes. Instead of sewing it permanently, attach the bow to a thin crochet band or ribbon that ties around the bear’s neck.
Final Thoughts
This white crochet bear with a sage bow is a lovely project when you want something classic, soft, and elegant.
The simple white body keeps the design timeless, while the blush cheeks, brown nose, and sage bow give the bear plenty of personality.
Once you have made the basic version, you can easily reuse the same design in different colors and create an entire collection of handmade bears.
It is a beautiful project for gifting, decorating, or simply enjoying a relaxing crochet session at home.