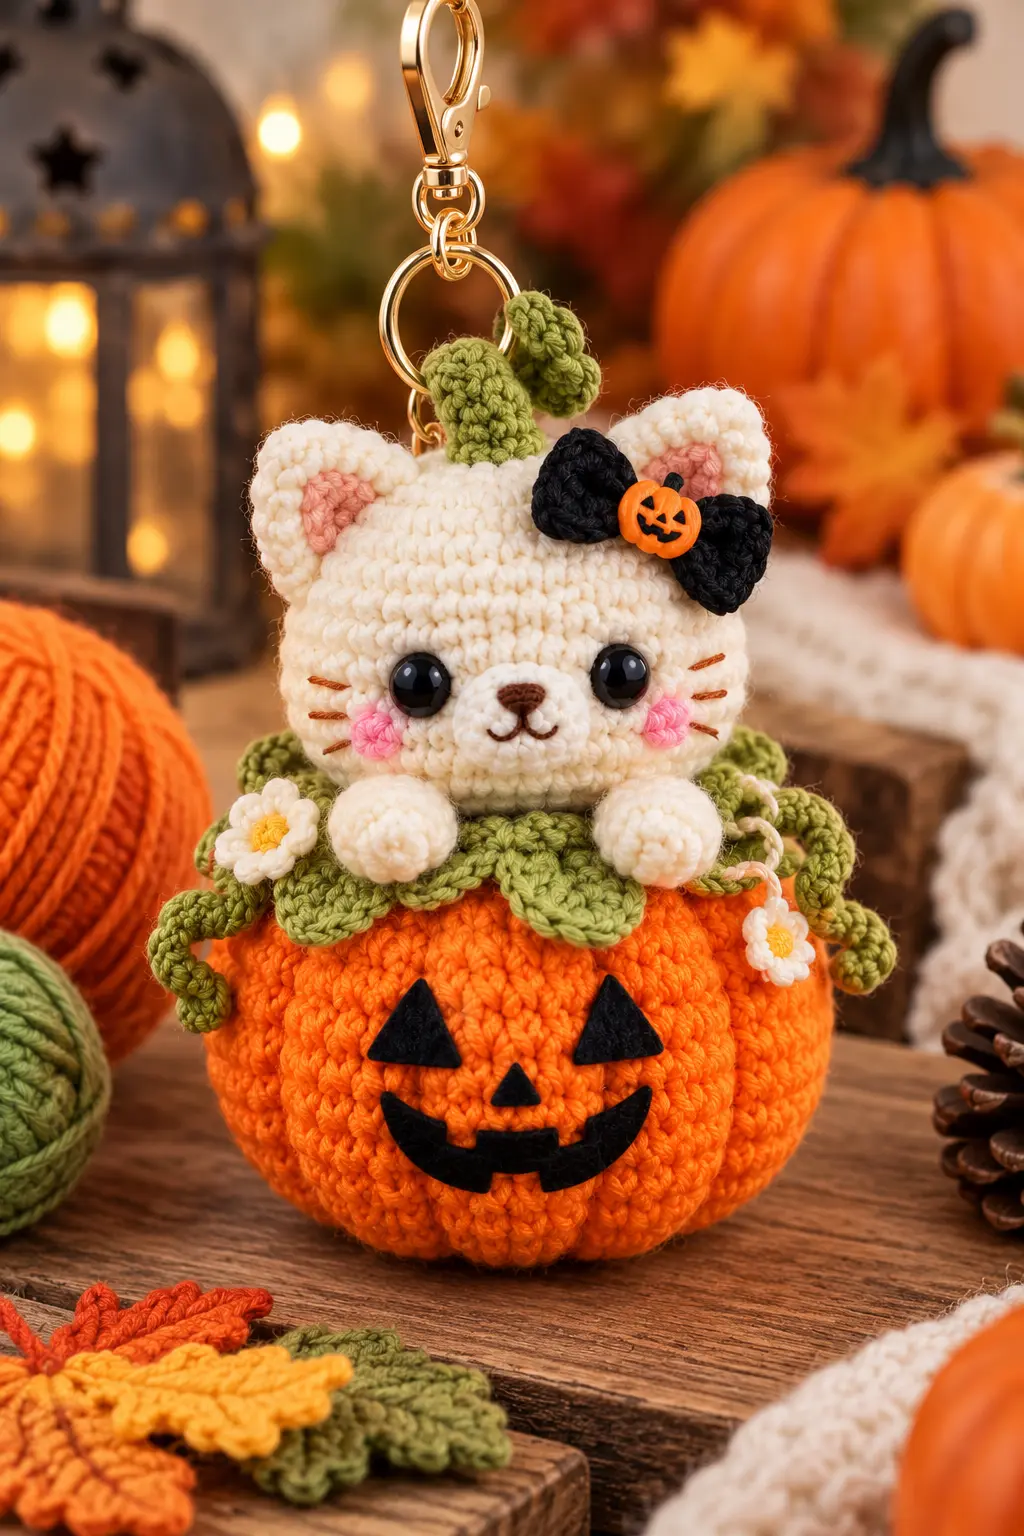
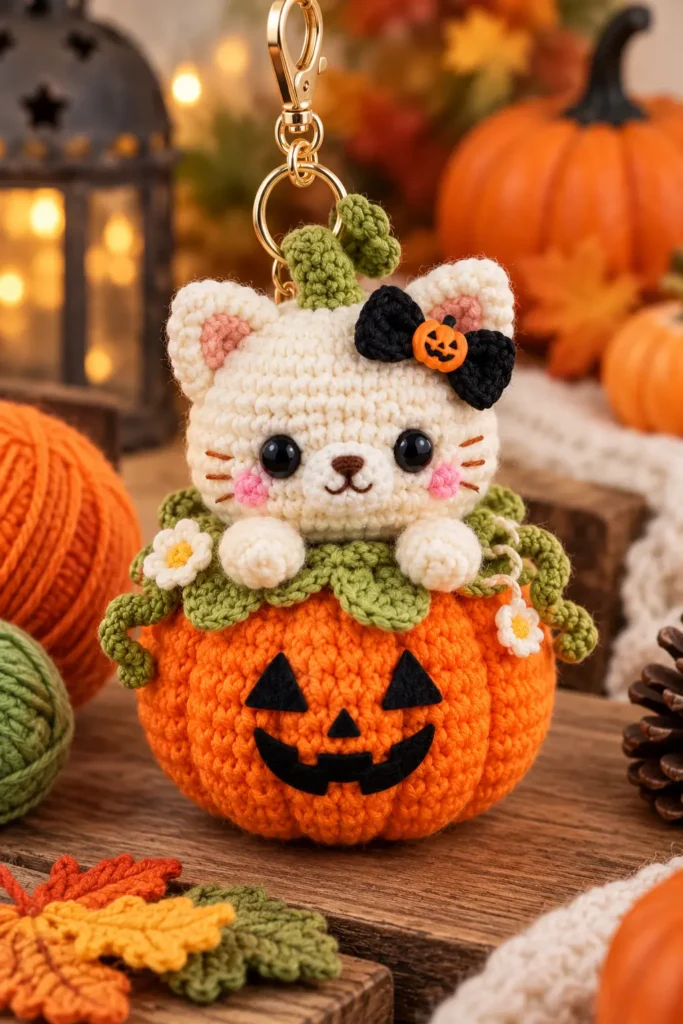
This crochet pumpkin cat charm is a cute and playful Halloween project that combines a cream-colored cat, a bright orange jack-o’-lantern pumpkin, soft green leaves, a black bow, and a gold keychain clasp.
It is perfect for decorating a handbag, backpack, keyring, Halloween gift basket, or seasonal craft display. The design looks detailed, but it becomes much easier when you make each part separately and assemble everything at the end.
This tutorial is ideal for anyone who already knows the basics of amigurumi, including working in rounds, increasing, decreasing, stuffing, and sewing crochet pieces together.
Why You’ll Love This Crochet Pumpkin Cat
This project is small, colorful, and full of personality. It also works well as a handmade gift because the finished piece is decorative but still practical as a bag charm or keychain.
You’ll especially love that it is:

YOUR COMPLETE RECIPE COLLECTION
Stop Searching for Meal Ideas—Get 50+ Delicious Recipes in One E-Book
Get the complete recipe e-book and discover delicious meal ideas collected in one convenient place.
Discover All 50+ Recipes- Cute and compact
- Perfect for Halloween
- Beginner-friendly for confident crocheters
- Easy to customize
- Great for using leftover yarn
- Suitable for keychains and bag charms
- Made from simple individual crochet pieces
- Easy to turn into different animal designs
The cream cat and orange pumpkin create a lovely contrast, while the green leaves and black bow give the design a polished finish.
Materials You’ll Need
Prepare the following supplies:
- Cream or off-white yarn for the cat
- Pink yarn for the ears and cheeks
- Brown yarn for the nose and whiskers
- Orange yarn for the pumpkin
- Green yarn for the leaves and stem
- Black yarn for the bow
- Small amount of white and yellow yarn for the flowers
- Black felt or black yarn for the jack-o’-lantern face
- Black safety eyes
- Fiberfill stuffing
- Crochet hook suitable for your yarn
- Yarn needle
- Scissors
- Stitch markers
- Gold keychain clasp and ring
Cotton or cotton-blend yarn is a good choice because it keeps the stitches neat and gives the charm enough structure.
Crochet Abbreviations
This tutorial uses standard US crochet terms:
MR – magic ring
sc – single crochet
inc – increase
dec – decrease
sl st – slip stitch
ch – chain
st/sts – stitch/stitches
Step 1: Crochet the Cat Head
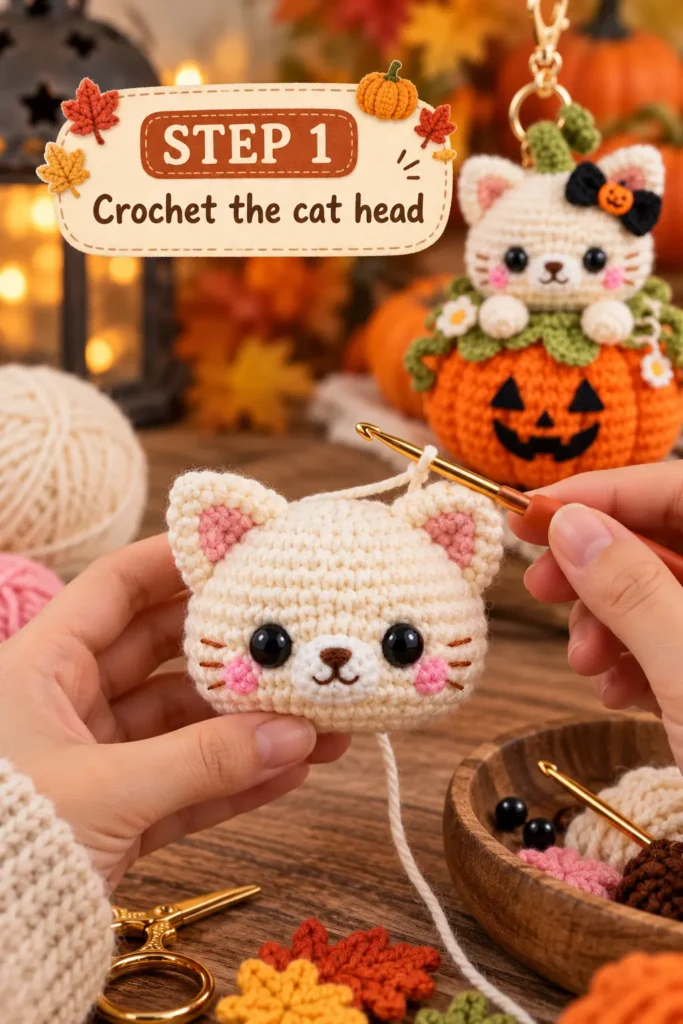
Start with cream-colored yarn.
Make a magic ring and work several single crochet stitches into the ring.
Increase evenly over the next few rounds until the circle is wide enough to form the cat’s head.
Continue crocheting without increases for several rounds so the shape begins to curve.
Before starting the decreases, insert the safety eyes.
Place them evenly on the front of the head.
Add the pink cheeks below the eyes either by embroidering small circles or crocheting tiny round pieces.
For the muzzle, crochet a small cream oval and sew it to the center of the face.
Use brown yarn to embroider a small nose, mouth, and whiskers.
Begin decreasing gradually.
Stuff the head firmly with fiberfill.
Continue decreasing until the opening is small enough to close.
Fasten off securely.
Step 2: Make the Cat Ears
Using cream yarn, crochet two small triangular ears.
You can make each ear by working back and forth in short rows or by crocheting a small triangle in the round.
Add a smaller pink triangle inside each ear.
Sew the pink inner piece onto the cream ear.
Position both ears on the top sides of the cat head.
Make sure they are symmetrical before sewing them permanently in place.
Step 3: Crochet the Cat Paws
Make two small paws using cream yarn.
Start with a magic ring.
Increase slightly to create a rounded paw shape.
Work a few rounds evenly.
Add a small amount of stuffing if desired.
Close each paw and leave a long yarn tail.
These paws will later rest on top of the pumpkin.
Step 4: Crochet the Pumpkin Base
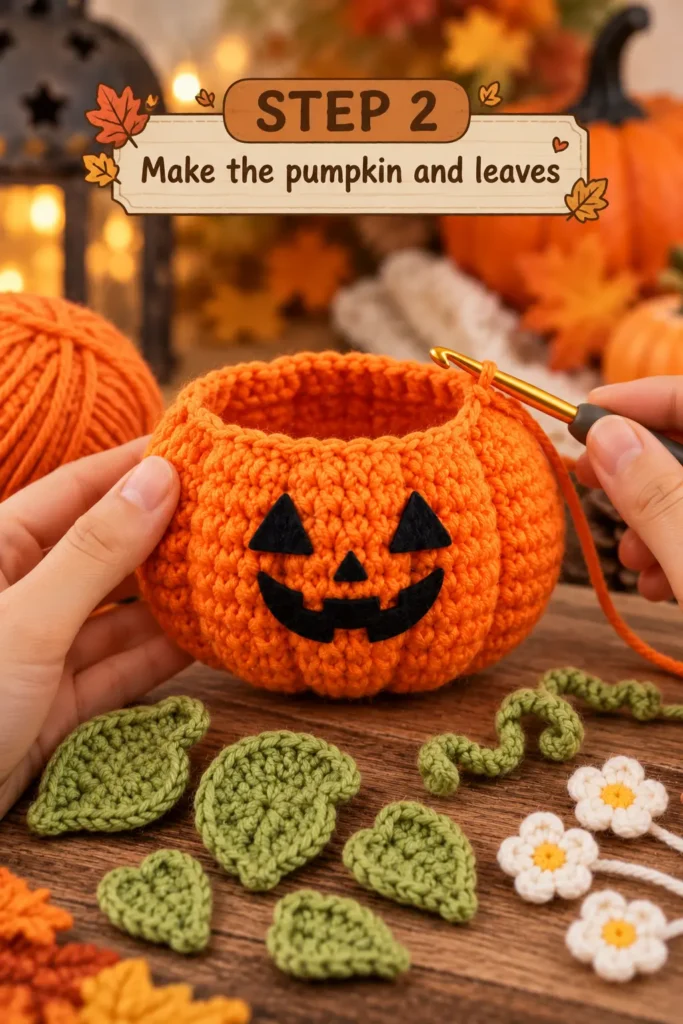
Switch to orange yarn.
Start with a magic ring and work single crochet stitches into it.
Increase over several rounds until the base reaches the width you want.
Continue crocheting evenly to build the pumpkin upward.
The pumpkin should be wide and slightly rounded.
Once it reaches the desired height, begin decreasing gradually.
Stuff firmly with fiberfill.
Before closing completely, shape the pumpkin with your hands.
For a more realistic pumpkin effect, thread a long strand of orange yarn through the center and wrap it around the outside several times.
Pull gently to create visible pumpkin sections.
Step 5: Add the Jack-o’-Lantern Face
Cut or crochet two small black triangles for the eyes.
Make a smaller triangle for the nose.
Create a curved black smile with small square teeth.
You can use felt for a clean graphic appearance or embroider the face directly with black yarn.
Arrange everything on the front of the pumpkin before attaching.
Make sure the face is centered.
Sew or secure all pieces firmly.
What Makes This Pattern Special
The most distinctive feature of this pattern is the way the cat appears to pop out of the pumpkin.
Instead of simply placing a cat beside a Halloween decoration, the design combines both elements into one compact charm.
The green leaves soften the transition between the cat and pumpkin, while the black bow and tiny pumpkin accent give the cat a festive Halloween look.
The keychain clasp also makes the project more useful because it can be attached to bags, backpacks, or keys.
Step 6: Crochet the Green Leaves
Using green yarn, chain several stitches.
Work along one side of the chain using a mix of slip stitches, single crochet, and slightly taller stitches to create a leaf shape.
Work back along the opposite side.
Fasten off and leave a tail for sewing.
Make several leaves.
You can make some larger and some smaller to create a more natural look.
Arrange them around the top edge of the pumpkin.
Leave enough space in the center for the cat.
Step 7: Add Curly Vines
Using green yarn, make a chain.
Work multiple stitches into each chain stitch so the piece naturally curls.
Make two or three vines.
Attach them around the pumpkin beside the leaves.
These small curls add texture and make the design look more detailed.
Step 8: Make the Small Flowers
Using white yarn, create a tiny flower by crocheting several petals around a small center.
Use yellow yarn for the middle.
Make two or three small flowers.
Attach them between the green leaves.
Keep them small so they do not overpower the cat or pumpkin.
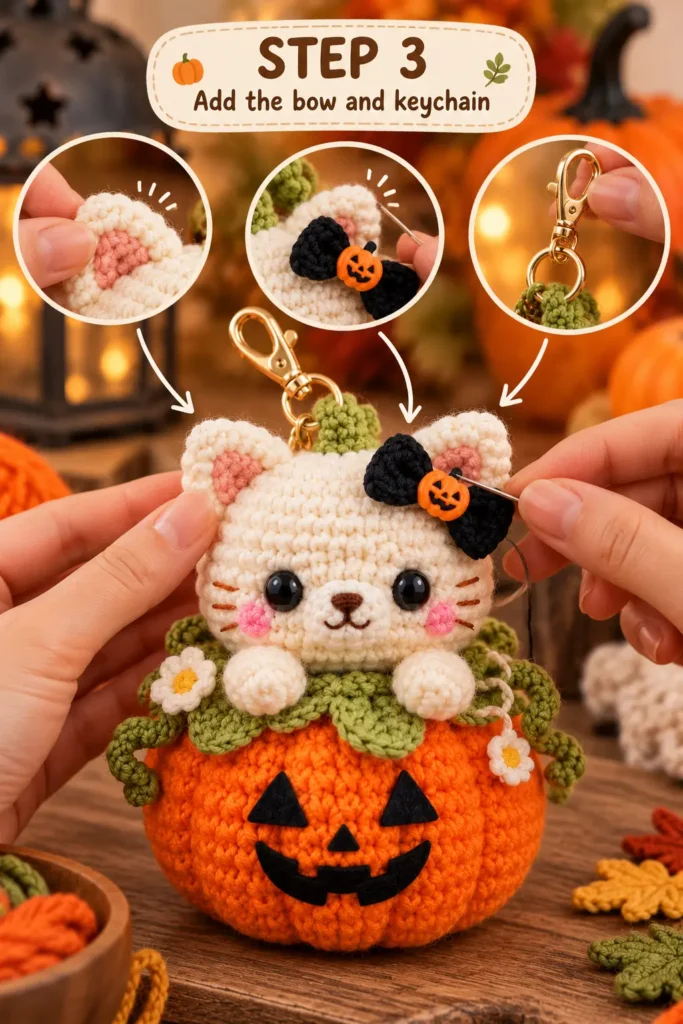
Step 9: Crochet the Black Bow
Using black yarn, crochet a small rectangle.
Pinch the rectangle in the center.
Wrap black yarn around the middle several times.
This forms the basic bow.
For the small pumpkin decoration in the center, you can crochet a tiny orange circle or use a small decorative charm.
Attach it securely to the bow.
Step 10: Attach the Bow to the Cat
Place the black bow near one ear.
Tilt it slightly for a cute, playful look.
Sew it securely to the cat head.
Make sure it does not cover the eye or ear.
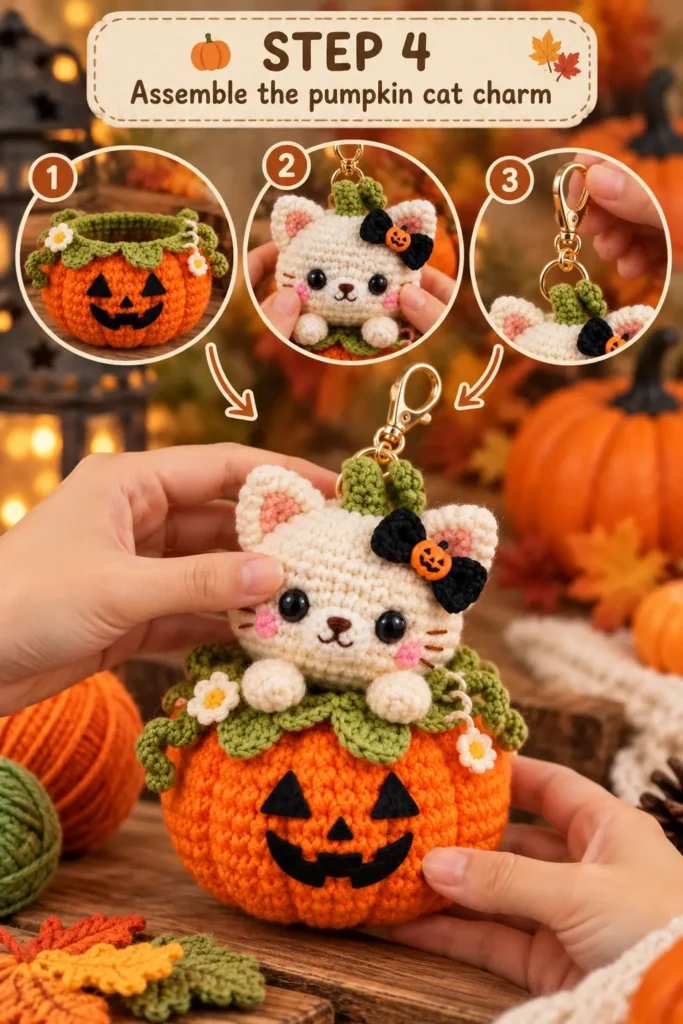
Step 11: Assemble the Cat and Pumpkin
Place the cat head above the pumpkin.
The bottom of the head should sit slightly behind the green leaves.
Position the paws on the front edge of the pumpkin so it looks as though the cat is leaning over the top.
Pin everything before sewing.
Once you are happy with the position, sew the cat head firmly to the pumpkin.
Then sew the paws in place.
Add the green leaves around the base of the cat head to hide the joining seam.
Step 12: Make the Keychain Attachment
Using green yarn, crochet a short sturdy loop or stem at the top of the cat.
Make sure it is strong enough to support the finished charm.
Insert the gold keychain ring through this loop.
Attach the clasp securely.
Before using the charm, gently pull on the clasp to make sure the connection is strong.
Expert Tips for Success
Use tight stitches so the stuffing does not show through.
Keep checking the proportions as you work, especially the cat head compared with the pumpkin.
Pin all pieces before sewing them permanently.
Use smaller amounts of stuffing for the paws and ears so they remain soft.
When attaching the keychain hardware, reinforce the crochet loop several times.
If the pumpkin looks too round, use orange yarn to create deeper vertical sections.
For a cleaner finish, weave in all yarn ends before final assembly.
Easy Variations
You can use the same construction to make many different versions.
Try a black cat with a purple pumpkin.
Make an orange cat with a cream pumpkin.
Replace the bow with a tiny witch hat.
Use purple and green leaves for a more dramatic Halloween palette.
You could also remove the jack-o’-lantern face and turn it into an autumn pumpkin cat instead of a Halloween design.
Another fun idea is to make matching pumpkin charms with a bunny, bear, ghost, or puppy.
How to Use Your Finished Crochet Charm
Your finished pumpkin cat can be used as:
- A handbag charm
- Backpack decoration
- Keychain
- Halloween gift
- Party favor
- Seasonal ornament
- Craft fair item
- Small handmade decoration
It also looks beautiful attached to a gift bag or Halloween basket.
Frequently Asked Questions
Is this crochet pumpkin cat suitable for beginners?
It is best for confident beginners who already know how to work in rounds, increase, decrease, and sew amigurumi pieces together.
What yarn is best?
Cotton or cotton-blend yarn works very well because it creates firm, defined stitches and holds the shape nicely.
Can I make it without the keychain?
Yes. Simply leave off the loop and hardware, and use it as a small Halloween decoration.
Can I make the pumpkin larger?
Yes. Add more increase rounds to the pumpkin and continue crocheting until you reach the size you want.
Final Thoughts
This crochet pumpkin cat charm is a fun Halloween project that combines several cute elements in one small design.
The cream cat, orange jack-o’-lantern pumpkin, green leaves, black bow, and gold clasp create a cozy seasonal look that works beautifully for Pinterest, handmade gifts, or your own Halloween collection.
Once you understand the basic construction, it is easy to customize the colors and details and create several different versions.
Save this pattern for your fall crochet ideas and enjoy making your own little Halloween pumpkin cat.