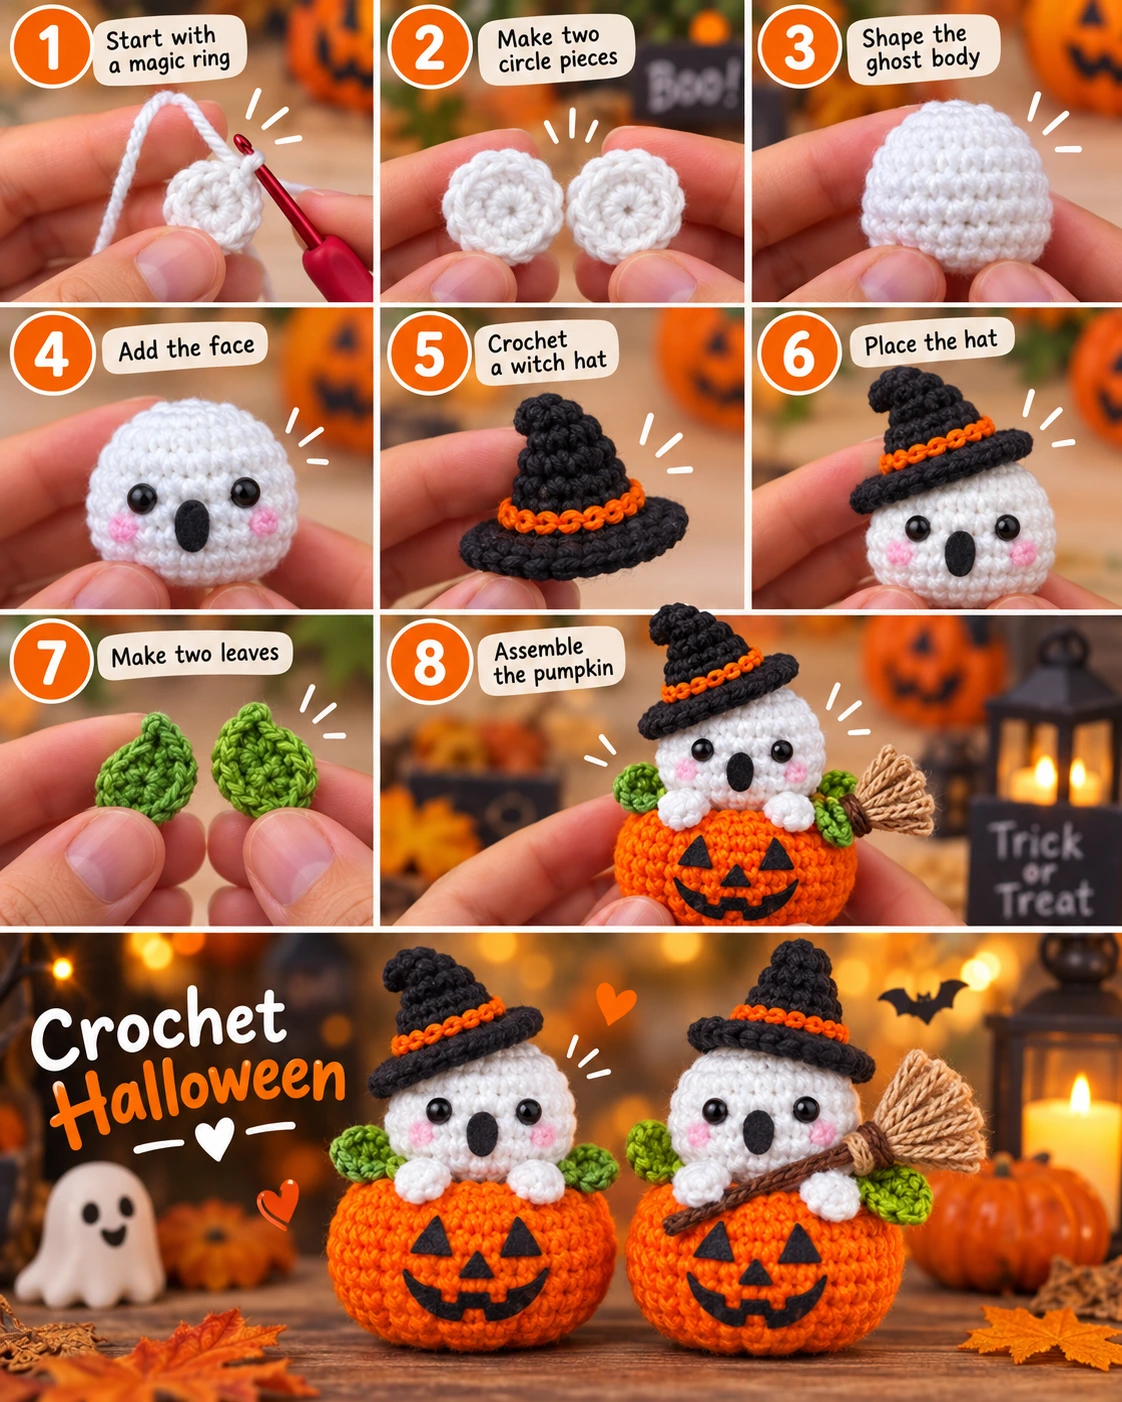
Looking for a fun Halloween crochet project that is cute instead of scary? This crochet Halloween ghost in a pumpkin is a cozy seasonal project that combines a tiny white ghost, an orange jack-o’-lantern, a black witch hat, green leaves, and a little broom into one adorable amigurumi decoration.
It is perfect for Halloween decor, handmade gifts, craft fairs, or simply adding a playful handmade touch to your home. The pattern is made from simple pieces that are crocheted separately and then assembled at the end, which makes it easier to follow and customize.
Why You’ll Love This Halloween Crochet Project
This project looks detailed, but the construction is actually quite manageable because the main pieces are made separately.
You’ll love that it is:
- Cute and beginner-friendly
- Perfect for Halloween decorating
- Easy to customize
- Made from simple crochet shapes
- Great for using leftover yarn
- Fun to photograph for Pinterest or social media
- Suitable as a handmade gift
- Easy to turn into different characters
You can make one ghost or create a whole little Halloween family with different hats, facial expressions, and pumpkin colors.

YOUR COMPLETE RECIPE COLLECTION
Stop Searching for Meal Ideas—Get 50+ Delicious Recipes in One E-Book
Get the complete recipe e-book and discover delicious meal ideas collected in one convenient place.
Discover All 50+ RecipesMaterials You’ll Need
To make this crochet Halloween ghost, prepare:
- White yarn for the ghost
- Orange yarn for the pumpkin
- Black yarn for the witch hat
- Green yarn for the leaves
- Small amount of brown or beige yarn for the broom
- Small amount of orange yarn for the hat band
- Crochet hook suitable for your yarn
- Fiberfill stuffing
- Yarn needle
- Scissors
- Stitch markers
- Black safety eyes or black embroidery thread
- Black felt or black yarn for the pumpkin face
- Pink yarn or blush for the cheeks, optional
A cotton or cotton-blend yarn works very well because it gives the finished figure good structure and clear stitch definition.
Crochet Abbreviations
This pattern uses standard US crochet terminology:
MR – magic ring
sc – single crochet
inc – increase
dec – decrease
sl st – slip stitch
ch – chain
st/sts – stitch/stitches
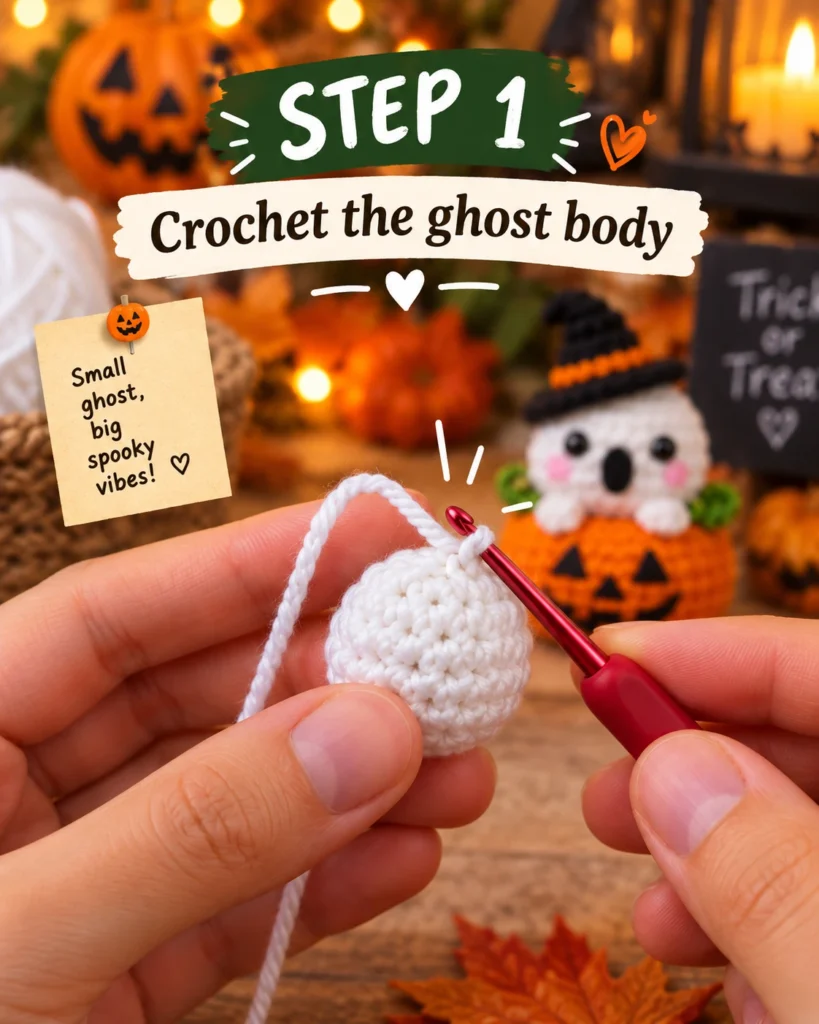
Step 1: Crochet the Ghost Body
Start with white yarn and create a magic ring.
Work single crochet stitches into the ring, then gradually increase in the following rounds until the piece becomes wide enough for the ghost head.
Continue crocheting evenly for several rounds to create a rounded shape.
Once the ghost reaches the desired size, begin decreasing gradually.
Before fully closing the piece, add fiberfill.
Stuff it firmly enough to hold its shape, but do not overfill it.
Add the safety eyes before the opening becomes too small, or embroider the eyes afterward if you prefer.
For the mouth, use black yarn or a small oval piece of black felt.
A little pink blush on the cheeks makes the ghost look especially cute.
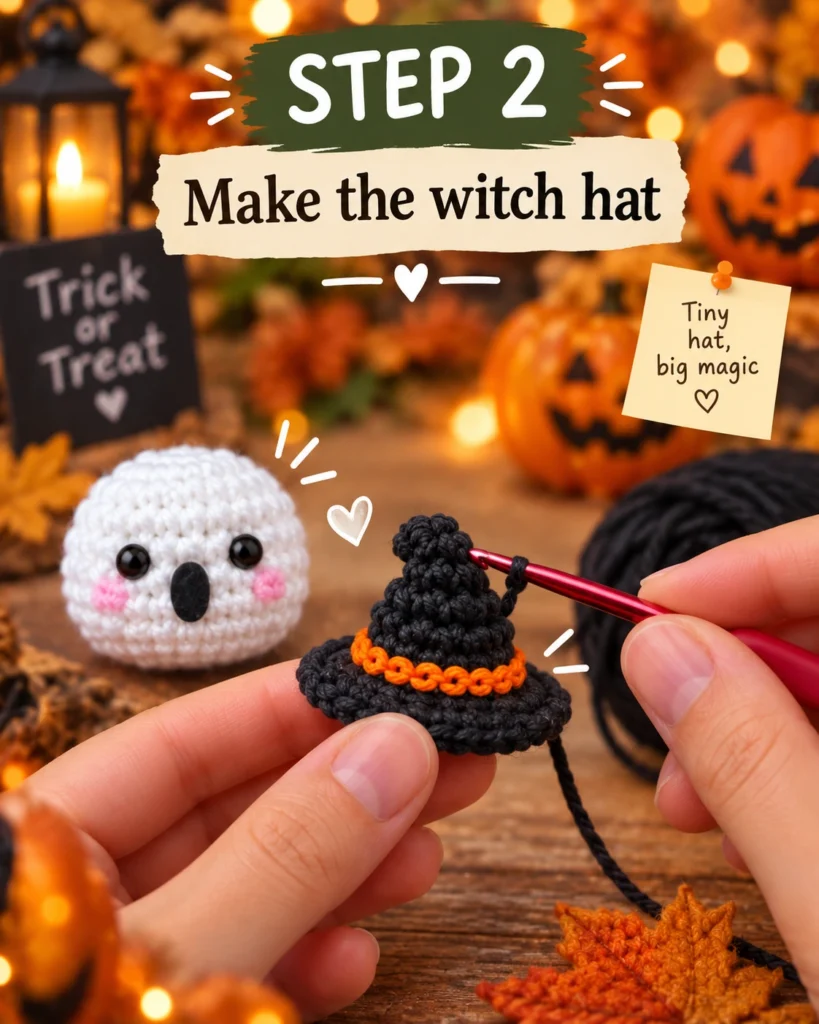
Step 2: Make the Witch Hat
Using black yarn, start with a magic ring.
Crochet a small cone shape by increasing slowly.
Continue until the hat is tall enough for the ghost.
For the brim, increase more quickly so the crochet begins spreading outward.
Work one or two rounds around the brim until you reach the desired width.
Fasten off.
Using orange yarn, crochet or embroider a small decorative band around the base of the hat.
You can make the hat slightly bent or curved for a more playful look.
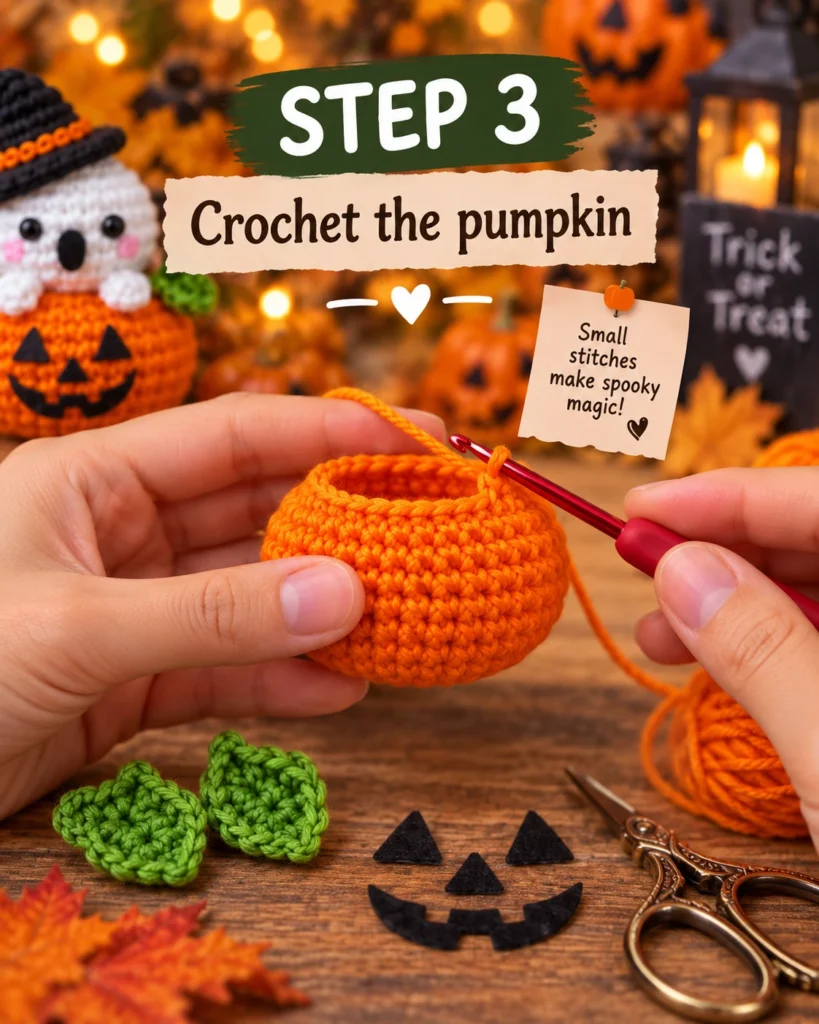
Step 3: Crochet the Pumpkin
Using orange yarn, begin with a magic ring.
Work increases until the base becomes wide enough.
Continue crocheting evenly for several rounds to create the pumpkin body.
Gradually decrease near the top.
Before closing completely, stuff the pumpkin firmly with fiberfill.
For a more defined pumpkin shape, thread orange yarn through the center and wrap it around the outside several times, gently pulling to create pumpkin sections.
Secure the yarn firmly.
Step 4: Add the Jack-o’-Lantern Face
Cut two small black triangles for the eyes and a smaller triangle for the nose.
For the mouth, cut a curved smile with little square teeth.
You can also embroider the face directly onto the pumpkin using black yarn.
Arrange the facial pieces before sewing or attaching them permanently.
Make sure the face is centered on the front of the pumpkin.
What Makes This Pattern Special
The charm of this project comes from the layered details.
The little ghost alone is cute, but placing it inside a jack-o’-lantern and adding a witch hat instantly gives the project more personality.
The additional leaves and broom also make the finished piece look much more complete without making the crochet itself too complicated.
This means you can create something that looks detailed and decorative while still using fairly basic techniques.
Step 5: Crochet the Leaves
Using green yarn, chain a few stitches.
Work back along the chain using different stitch heights to create a pointed leaf shape.
For example, use slip stitches near the tip, single crochet, and slightly taller stitches near the middle.
Work back along the opposite side of the chain.
Fasten off and leave a yarn tail for sewing.
Make two leaves.
Position them on either side of the pumpkin.
Step 6: Make the Little Ghost Arms
Using white yarn, crochet two tiny oval or rounded pieces.
Keep them small because they only need to look like little ghost hands resting on top of the pumpkin.
Lightly stuff them if needed.
Sew them to the front of the ghost body.
Step 7: Make the Broom
The broom can be made very simply.
Use brown yarn, a thin crocheted chain, or even a small craft stick for the handle.
For the broom end, cut several short strands of beige or tan yarn.
Fold the strands together and tie them securely around one end of the handle.
Trim the ends evenly.
Attach the broom beside the finished ghost.
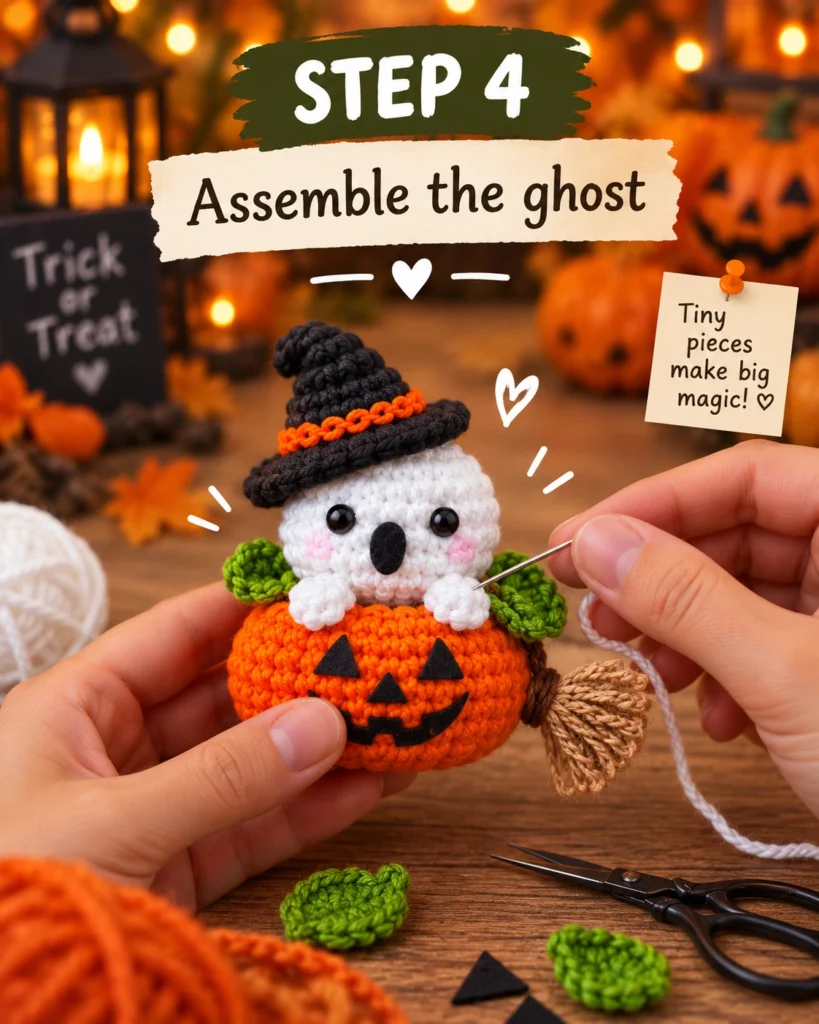
Step 8: Assemble the Ghost
This is where all the pieces come together.
Place the white ghost on top of the orange pumpkin.
Before sewing, check the position from the front.
The ghost should sit slightly behind the pumpkin so its little arms can rest over the top edge.
Using a yarn needle and matching yarn, sew the ghost securely to the pumpkin.
Next, sew the green leaves to each side.
Attach the witch hat to the top of the ghost.
Then position the broom along one side.
Finally, check all your seams and weave in any remaining yarn ends.
Expert Tips for Success
Keep your stitches tight when making amigurumi. Loose stitches can allow the stuffing to show through.
Use a crochet hook slightly smaller than what you would normally use for the yarn.
Always stuff gradually rather than adding all the filling at once.
When assembling, pin all pieces in place first. This lets you check the final appearance before sewing.
If the ghost leans too far forward, add extra stitches at the back when attaching it to the pumpkin.
For children’s toys, embroidered facial features are safer than plastic safety eyes.
Easy Variations
Once you make the basic version, there are many ways to customize it.
Try a purple witch hat instead of black.
Make the pumpkin cream, green, or dusty pink for a softer Halloween look.
Replace the witch hat with a tiny bow.
Add a small crochet bat.
Make a sleepy ghost with embroidered closed eyes.
Use different facial expressions for each pumpkin.
You could also create several finished characters and arrange them together as a Halloween centerpiece.
How to Display Your Crochet Halloween Ghost
This little amigurumi is a lovely seasonal decoration for:
- Halloween shelves
- Entryway tables
- Desks
- Kids’ rooms
- Party decorations
- Craft market displays
- Gift baskets
- Fall centerpieces
It is especially cute when displayed beside mini pumpkins, candles, autumn leaves, or fairy lights.
Frequently Asked Questions
Is this Halloween crochet pattern beginner-friendly?
Yes. The individual pieces are simple shapes. The main skills required are working in the round, increasing, decreasing, and sewing crochet pieces together.
Can I make the ghost without the pumpkin?
Absolutely. The white ghost can be used by itself as a small Halloween amigurumi.
Can I make the project larger?
Yes. Use thicker yarn and a larger hook, or continue increasing the base pieces until they reach your preferred size.
Do I need felt for the pumpkin face?
No. You can embroider the eyes, nose, and mouth using black yarn instead.
Final Thoughts
This crochet Halloween ghost in a pumpkin is a fun seasonal project that combines simple crochet techniques with lots of cute finishing details.
The white ghost, orange pumpkin, black witch hat, green leaves, and tiny broom create a cheerful Halloween character that looks much more complicated than it actually is.
Once you finish one, it is easy to imagine making several more in different colors and expressions.
Save this pattern for your Halloween crochet list, and have fun creating your own little spooky-but-sweet ghost.