Introduction
There are some flavors that just transport you straight back to childhood, aren’t there? For me, it’s the unmistakable taste of a creamsicle—that creamy, dreamy, orange-vanilla popsicle that seemed to make every summer afternoon in Chicago just a little bit brighter. I can still picture myself as a little girl, sitting on the front steps of our brick bungalow on the Northwest Side, the sticky sweetness coating my fingers while my mom called out from the kitchen window that dinner was almost ready. It was pure, uncomplicated joy in its simplest form.
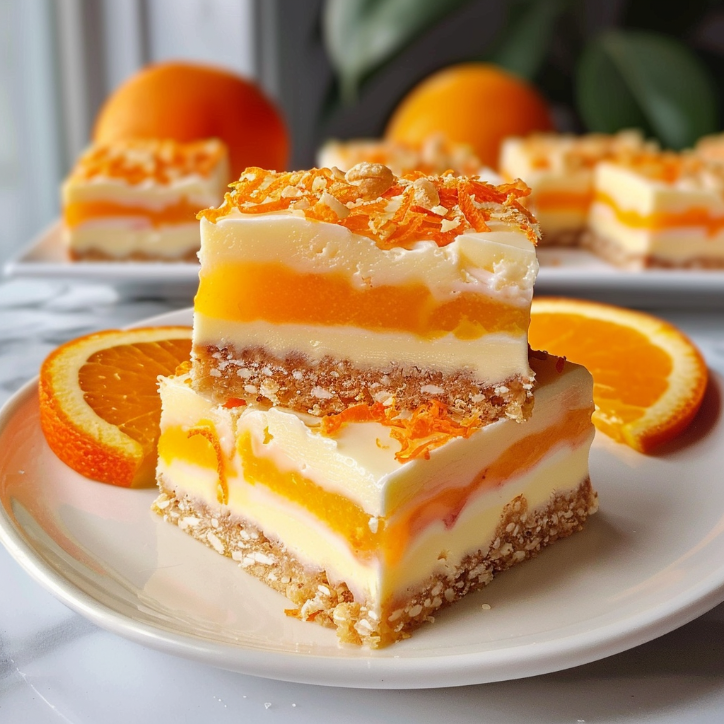
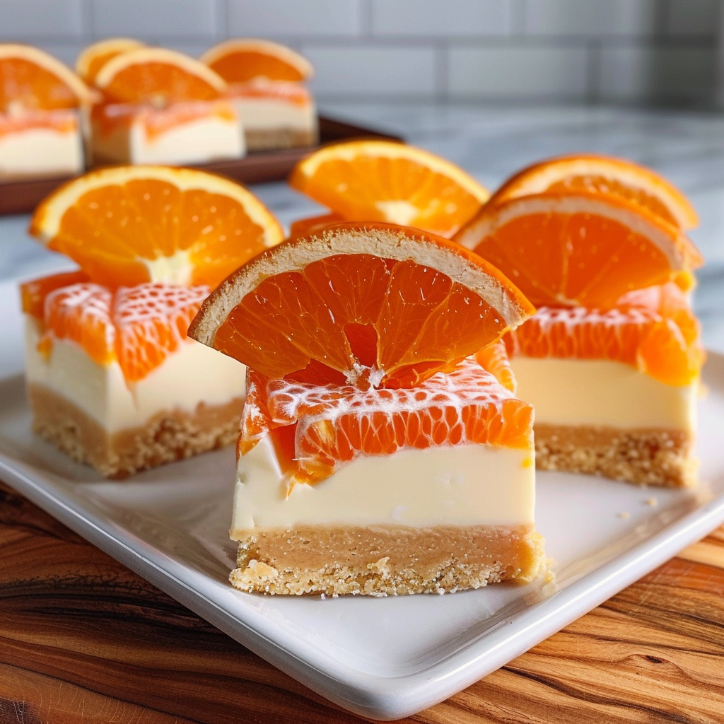
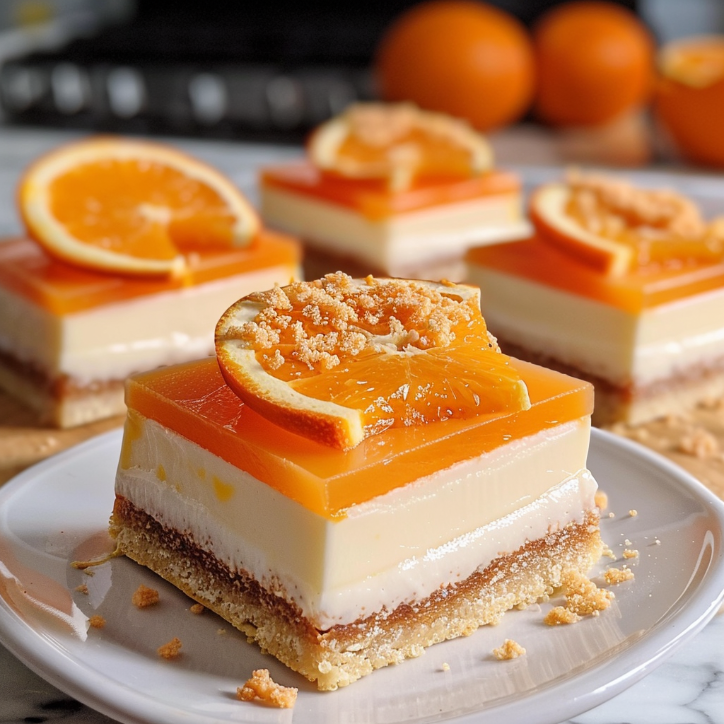
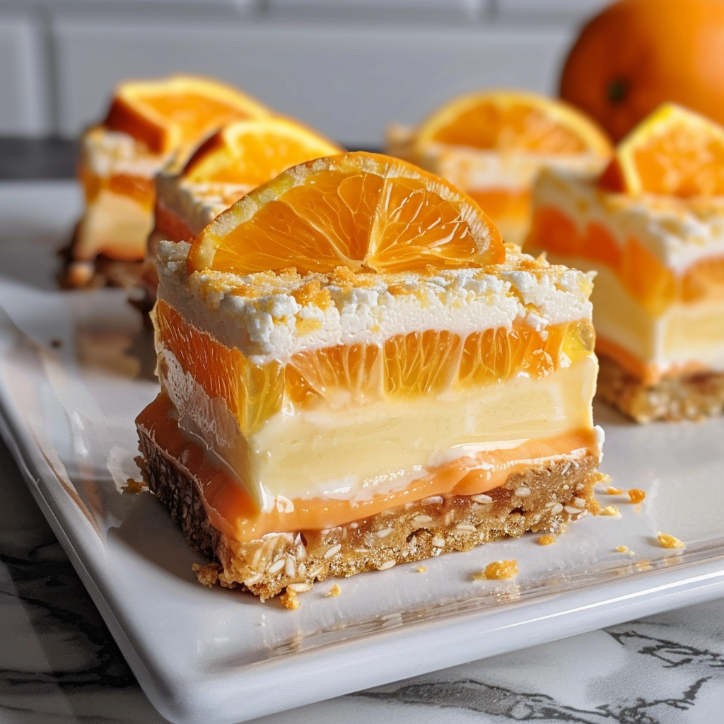
Now, as a mom myself, I love taking those nostalgic flavors and giving them a cozy, homemade twist that my own kids, Ella and Peter, can enjoy. That’s exactly how my orange creamsicle dream bars came to be. These little squares of sunshine are everything I loved about those summer popsicles, but transformed into a rich, buttery, and utterly irresistible dessert bar. They have a golden, slightly crisp shortbread crust, a luscious and creamy orange filling, and a sweet, tangy glaze that ties it all together. They’re the kind of dessert that makes the whole house smell like a bakery and my husband, Tom, start hovering around the kitchen with a hopeful look in his eyes.
This recipe is a love letter to those long, hazy summer days, to my Polish-American grandmother’s belief that dessert should always be shared, and to the simple magic of combining two humble ingredients—orange and vanilla—into something truly special. It’s a dessert that feels both familiar and exciting, and I am so, so excited for you to make these in your own kitchen.
Why You’ll Love This Recipe
Oh, where do I even begin? These orange creamsicle dream bars are the perfect marriage of texture and flavor. First, you have that buttery, melt-in-your-mouth shortbread crust that provides the perfect sturdy base. It’s not too sweet, which makes it the ideal counterpoint to the bright, zesty filling. Then comes the star of the show: a velvety-smooth, baked custard-like layer that’s bursting with fresh orange flavor and swirled with creamy vanilla. It’s dense, rich, and tastes just like the center of a premium ice cream bar.
What I love most, besides the incredible taste, is how incredibly easy they are to make. You don’t need any fancy equipment or hard-to-find ingredients. Everything comes together in one bowl for the crust and another for the filling. It’s a wonderfully straightforward recipe that even beginner bakers can master with confidence. Plus, they’re a fantastic make-ahead dessert. You can bake them a day in advance, and they actually get even better as the flavors meld together in the fridge. They’re perfect for summer potlucks, family reunions, or just a special weekend treat for the people you love most.
Ingredients
This ingredient list is beautifully simple, using pantry staples to create something truly magical. Here’s everything you’ll need to create your own batch of sunshine.

YOUR COMPLETE RECIPE COLLECTION
Stop Searching for Meal Ideas—Get 50+ Delicious Recipes in One E-Book
Get the complete recipe e-book and discover delicious meal ideas collected in one convenient place.
Discover All 50+ RecipesFor the Shortbread Crust
- 1 ½ cups (190g) all-purpose flour – This gives the crust its structure. For a slightly nuttier flavor, you could substitute ½ cup of the all-purpose flour with almond flour.
- ½ cup (100g) granulated sugar – Adds just the right amount of sweetness to the base.
- ¾ cup (1 ½ sticks / 170g) cold unsalted butter, cubed – Cold butter is key for a flaky, tender crust. It creates steam as it bakes, resulting in that perfect crumbly texture. If you only have salted butter on hand, just reduce the added salt to a pinch.
- ¼ teaspoon salt – Enhances all the flavors and balances the sweetness.
For the Creamsicle Filling
- 2 large eggs – These bind the filling together and give it that rich, custard-like texture. Let them come to room temperature for the best results.
- ¾ cup (150g) granulated sugar – Sweetens the creamy filling.
- 1 (8-ounce) block cream cheese, softened – This is the secret to the dreamy, creamy texture. It adds a subtle tang that mimics the richness of the ice cream.
- ½ cup (120ml) sour cream – Adds moisture and a slight tang that brightens the whole flavor profile.
- ¼ cup (60ml) fresh orange juice – About 1 large orange. Please, please use fresh juice! The flavor is incomparable to the bottled stuff. It’s brighter, more vibrant, and makes all the difference.
- 1 tablespoon orange zest – This is where the intense orange flavor lives. Be generous! The natural oils in the zest are packed with flavor.
- 1 teaspoon vanilla extract – The classic partner to orange, creating that true creamsicle taste.
For the Orange Glaze (Optional but Highly Recommended)
- 1 cup (120g) powdered sugar – The base for our shiny, sweet glaze.
- 2-3 tablespoons fresh orange juice – To thin the glaze to the perfect drizzling consistency.
- ½ teaspoon orange zest – For an extra pop of color and flavor in the glaze.
Step-by-Step Instructions
Alright, let’s get our hands a little floury and make some magic! The process is as enjoyable as the result. Follow these steps, and you’ll have a pan of these orange creamsicle dream bars cooling on your counter in no time.
Step 1: Prepare the Oven and Pan
First things first, preheat your oven to 350°F (175°C). This ensures the oven is nice and hot when we’re ready to bake. Line an 8×8-inch baking pan with parchment paper, leaving some overhang on two opposite sides. These “handles” will make it so much easier to lift the bars out of the pan once they’re cool and fudgy.
Step 2: Make the Shortbread Crust
In a medium-sized mixing bowl, whisk together the flour, sugar, and salt. Now, add in the cold, cubed butter. Using a pastry blender, two forks, or your fingertips, work the butter into the dry ingredients until the mixture resembles coarse crumbs with some pea-sized butter pieces remaining. Don’t overwork it; those little chunks are what make the crust tender. Press the mixture firmly and evenly into the bottom of your prepared pan. I like to use the bottom of a flat measuring cup to get it nice and compact.
Step 3: Par-Bake the Crust
Place the pan in the preheated oven and bake the crust for 15 minutes, or until it’s just set and the edges are lightly golden. This par-baking step ensures the crust stays crisp and doesn’t get soggy under the wet filling. While the crust bakes, it’s time to make the filling. Set the crust aside to cool slightly on a wire rack while you prepare the next layer.
Step 4: Create the Creamy Filling
In a large mixing bowl, beat the softened cream cheese and sugar together until the mixture is completely smooth and fluffy. Make sure there are no lumps! A hand mixer on medium speed works perfectly for this. Beat in the eggs, one at a time, mixing well after each addition. Then, add the sour cream, fresh orange juice, orange zest, and vanilla extract. Mix until everything is just combined and the filling is smooth and creamy. Be careful not to overmix, as this can incorporate too much air and cause cracks in the filling while baking.
Step 5: Assemble and Bake
Pour the creamy orange filling over the warm, par-baked crust. Gently spread it into an even layer with a spatula. Carefully transfer the pan back to the oven and bake for 30-35 minutes. The bars are done when the edges are set and the center is just barely jiggly. It should have a slight wobble in the very center, like a good cheesecake. It will continue to set as it cools. Remove from the oven and let it cool completely on a wire rack.
Step 6: Chill and Glaze
Once the bars have cooled to room temperature, cover the pan with plastic wrap and transfer it to the refrigerator. Chill for at least 4 hours, or preferably overnight. This is a crucial step for clean, beautiful slices. Once fully chilled, prepare the glaze by whisking together the powdered sugar, orange juice, and zest until smooth. Pour the glaze over the chilled bars and spread it into an even layer. Let the glaze set for about 15-20 minutes before slicing.
Step 7: Slice and Serve
Using the parchment paper overhang, lift the entire block of bars out of the pan and onto a cutting board. Use a sharp knife to slice them into 16 neat squares. For the cleanest cuts, wipe the knife with a damp paper towel between each slice.
What Makes This Recipe Special
- Quick and easy to prepare
- Packed with flavor and nutrition
- Perfect for any occasion
- Customizable to your taste preferences
- Budget-friendly ingredients
Expert Tips for Success
I’ve made these orange creamsicle dream bars more times than I can count, and I’ve learned a few things along the way that make all the difference. Here are my top secrets for perfect bars every single time.
- Use Room-Temperature Ingredients: For the filling, make sure your cream cheese, eggs, and sour cream are at room temperature. This ensures a smooth, lump-free batter that bakes evenly. Cold ingredients can seize up and create a clumpy filling.
- Don’t Overmix the Filling: Once you add the eggs, mix just until they’re incorporated. Overmixing adds too much air, which can cause the filling to puff up and crack as it bakes and cools.
- The “Jiggle” Test: The center of the bars should have a slight, gentle jiggle when you shake the pan. If it’s completely firm, it’s overbaked. If it’s very liquidy, it needs more time. You’re looking for that perfect middle ground.
- Patience is Key: I know it’s hard to wait, but chilling the bars for at least 4 hours is non-negotiable. This allows the filling to fully set, making it possible to get those beautiful, clean slices without them falling apart.
- Zest Before You Juice: Always zest your oranges before you juice them. It’s much harder to zest a squishy, juiced orange half!
Variations and Substitutions
This recipe is a wonderful canvas for creativity. While I adore the classic orange-vanilla combo, here are a few fun ways to switch it up and make it your own.
Citrus Swaps
Feel free to swap the oranges for other citrus fruits. Lemon would create a bright, tart “lemon creamsicle” bar. A mix of orange and blood orange would give a beautiful pink hue and a more complex flavor. You could even try grapefruit for a more sophisticated, slightly bitter twist.
Gluten-Free Option
To make these bars gluten-free, simply substitute the all-purpose flour in the crust with a 1:1 gluten-free baking flour blend. The texture will be slightly different but still deliciously crumbly and buttery.
Add a Crunch
For a little extra texture, you can sprinkle some white chocolate chips or chopped macadamia nuts over the filling before baking. The white chocolate will melt into creamy pockets, and the nuts will add a lovely crunch.
Make it a Layered Dream
For a more decadent treat, you can add a thin layer of melted white chocolate on top of the cooled, baked bars before adding the orange glaze. It’s an extra step, but it’s pure indulgence.
Serving Suggestions
These orange creamsicle dream bars are wonderful all on their own, but they also pair beautifully with a few simple additions. For a summery dessert, serve them chilled with a scoop of vanilla bean ice cream and a few fresh raspberries or blueberries on the side. The tart berries are a fantastic contrast to the sweet, creamy bars.
They also make a lovely addition to a brunch spread or a coffee break. A warm cup of coffee or a glass of cold milk are the perfect beverages to accompany them. If you’re feeling extra fancy, you could even serve them with a dollop of freshly whipped cream and a sprig of mint for a pop of color. For a fun, adult twist, a glass of sparkling wine or a mimosa would be a delightful pairing.
FAQs
I always get a few questions about this recipe, so I wanted to answer some of the most common ones for you right here.
Can I use bottled lemon or orange juice?
I really recommend using fresh juice. The flavor is brighter, more vibrant, and less acidic than bottled juice. It truly makes a difference in the final taste of your bars. The zest is also a key flavor component, and you can only get that from fresh oranges.
How should I store these bars?
Store any leftover bars in an airtight container in the refrigerator. They will keep well for up to 5 days. In fact, they taste even better the next day after the flavors have had time to meld together.
Can I freeze orange creamsicle dream bars?
Yes, these bars freeze beautifully! Once they are fully chilled and sliced, place them in a single layer in an airtight, freezer-safe container, separating layers with parchment paper. They can be frozen for up to 3 months. To thaw, simply transfer them to the refrigerator overnight.
My filling cracked. What went wrong?
Cracks can happen for a few reasons. It could be from overmixing the filling, which incorporates too much air. It could also be from overbaking. Remember to pull them out when the center has just a slight jiggle. Finally, a sudden change in temperature can cause cracking, so make sure to cool them gradually on the counter before moving them to the fridge.
Can I make this in a 9×13-inch pan?
Absolutely! To make a larger batch in a 9×13-inch pan, you’ll want to double the recipe. You may also need to increase the baking time slightly, so keep an eye on it and use the jiggle test to determine doneness.
Final Thoughts
There you have it, my friends—my recipe for the most delightful orange creamsicle dream bars. They’re a little bit nostalgic, a whole lot creamy, and guaranteed to bring a smile to the faces of everyone you share them with. They remind me that the simplest flavors, made with love and a little bit of care, are often the most memorable. I hope they become a new favorite in your home, just as they have in mine.
So go on, preheat that oven, and get ready to fill your kitchen with the most wonderful aroma. And when you take that first bite, I hope you’re transported back to a sunny day, just like I am. Happy baking, everyone!
I hope you loved making these orange creamsicle dream bars—they’re bright, creamy, and taste like a sunbeam that you can eat, making even a rainy Tuesday feel like a summer vacation. If you’re in the mood for more sweet treats, be sure to check out my Classic Chocolate Chip Cookies for a timeless favorite, or my Fudgy Brownie Bites for the ultimate chocolate fix. For something a little different, you could also try my Lemon Blueberry Crumb Bars for another fruity delight, or my No-Bake Peanut Butter Bars for a quick and easy treat that requires zero oven time.
Join us on our Facebook Page and Facebook Group—and don’t forget to follow us on Pinterest for daily inspiration!
· American ·
Orange Creamsicle Dream Bars: A Family Favorite
These orange creamsicle dream bars feature a buttery shortbread crust, a creamy orange-vanilla filling, and a sweet citrus glaze. They're a nostalgic, make-ahead dessert that tastes just like the classic summer popsicle.
Keep the screen of your device on while you follow the steps.
- Preheat oven to 350°F (175°C) and line an 8×8-inch pan with parchment paper.
- Mix flour, sugar, and salt. Cut in cold butter until crumbly.
- Press crust mixture firmly into the prepared pan.
- Bake crust for 15 minutes until lightly golden. Cool slightly.
- Beat cream cheese and sugar until smooth. Add eggs one at a time.
- Mix in sour cream, orange juice, orange zest, and vanilla until combined.
- Pour filling over the warm crust and spread evenly.
- Bake for 30-35 minutes until edges are set and center is slightly jiggly.