Introduction
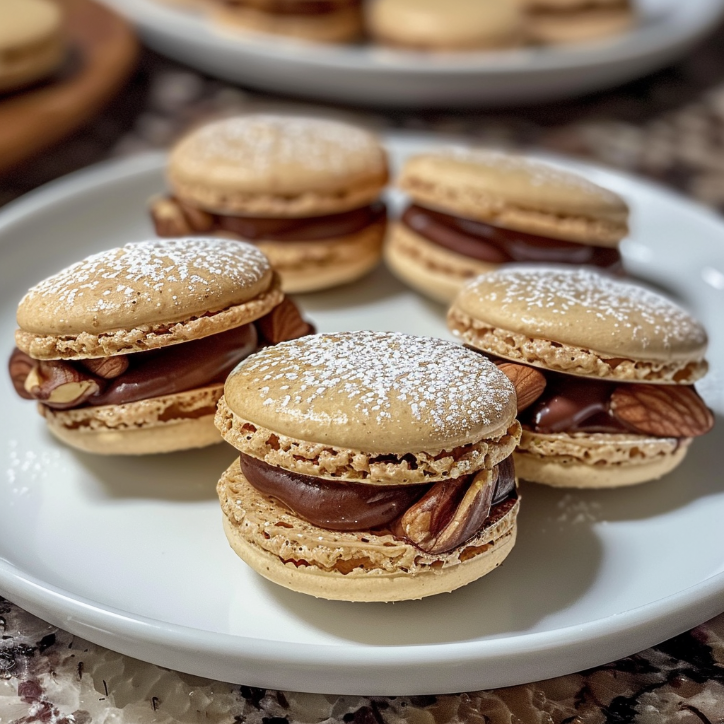
You know those recipes that feel like a warm hug from the inside out? The ones that transport you straight back to a cozy Chicago kitchen, where the smell of butter and sugar mingles with the sound of your mother humming an old Polish lullaby? That’s exactly the feeling I get when I make these decadent chocolate hazelnut macarons. I can still picture my babcia’s hands, dusted with flour, patiently folding ingredients together with a quiet kind of love. She taught me that baking isn’t just about following a recipe—it’s about pouring a little bit of your heart into every single step.
Now, I’ll be the first to admit that macarons have a reputation for being finicky. My husband, a man who can fix anything from a leaky faucet to a broken lawnmower, still looks at me with a mix of awe and terror when I pull out the almond flour and egg whites. But let me tell you, with a little patience and a whole lot of love, these little French delights are completely achievable in your own kitchen. They’re the kind of treat that makes my daughter Ella’s eyes light up and my son Peter ask for “just one more, please, Mom” until the box is mysteriously empty. This recipe for decadent chocolate hazelnut macarons is my love letter to those perfect, crisp-meets-chewy moments of pure joy.
Why You’ll Love This Recipe
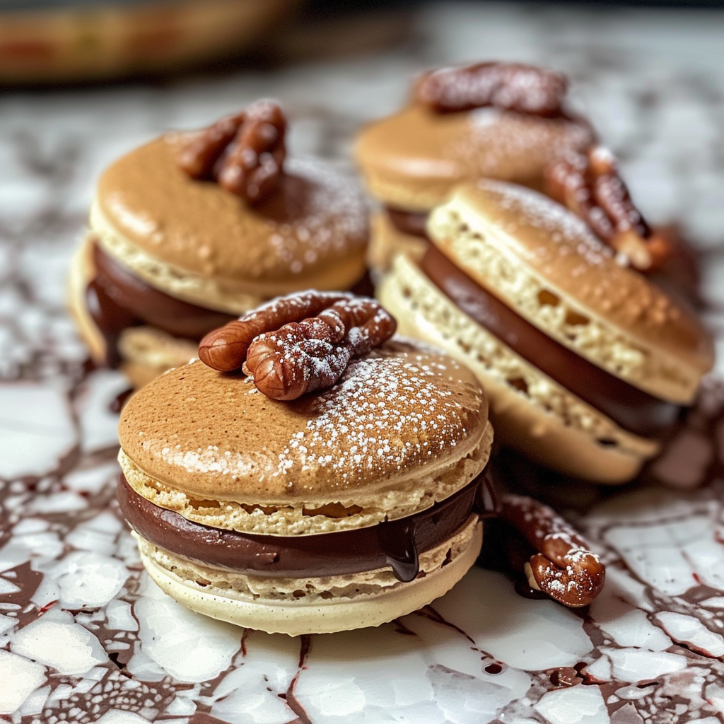
These aren’t just any macarons. They are a symphony of textures and flavors, a truly special treat that feels like a five-star patisserie creation but is made right in your own home. The star of the show is the rich, nutty flavor of roasted hazelnuts, which pairs beautifully with deep, dark chocolate. The filling is a silky, luscious chocolate hazelnut ganache that is so good you’ll want to eat it with a spoon (I won’t tell if you don’t!).
This recipe is designed for success. I’ve broken down every step, shared my best tips, and included all the little secrets I’ve learned over the years to help you avoid the dreaded cracked shell or the lopsided foot. While macarons do require a bit of care, this recipe is surprisingly approachable for a home baker. Plus, they are naturally gluten-free, making them a wonderful dessert option for guests with dietary restrictions. They are the perfect showstopper for a birthday, a bridal shower, or just a special “because it’s Tuesday” kind of day.
Ingredients
Here’s what you’ll need to create these little bites of heaven. I’ve organized everything to make your shopping and prep a breeze. Remember, precision is key in macaron making, so having everything measured and ready to go (your mise en place!) is half the battle.
For the Macaron Shells:
- 1 cup (100g) powdered sugar – This helps create a smooth, shiny top.
- 3/4 cup (75g) almond flour – Use super-fine almond flour for the best results. I like to pulse it with the powdered sugar in a food processor to make it even finer.
- 1/4 cup (25g) hazelnut flour – This is the secret to that incredible nutty flavor. If you can’t find it, you can finely grind roasted, skinned hazelnuts with a little of the powdered sugar.
- 2 tablespoons (15g) unsweetened cocoa powder – Use a high-quality Dutch-processed cocoa for a deeper chocolate flavor.
- 2 large egg whites (about 60g) – Make sure they are at room temperature. Aging them in the fridge for 24 hours is a great trick for a more stable meringue.
- 1/4 cup (50g) granulated sugar – This is for the meringue.
- 1/4 teaspoon cream of tartar – This helps stabilize the egg whites.
For the Chocolate Hazelnut Ganache Filling:
- 1/2 cup (120ml) heavy cream
- 4 oz (115g) semi-sweet or dark chocolate, finely chopped – Use a good quality bar, not chocolate chips, for the smoothest ganache.
- 2 tablespoons (30g) unsalted butter, softened – This adds a beautiful shine and silky texture.
- 1/4 cup (60g) chocolate hazelnut spread (like Nutella) – This amps up the hazelnut flavor and makes the filling extra decadent.
- 1/2 teaspoon vanilla extract – A little splash of pure vanilla enhances all the other flavors.
- Pinch of sea salt – To balance the sweetness and bring out the chocolate.
Step-by-Step Instructions
Alright, let’s get to the fun part! Follow these steps carefully, and you’ll be amazed at what you can create. I promise, the feeling of peeling that first perfect macaron off the parchment paper is pure magic.
YOUR COMPLETE RECIPE COLLECTION
Stop Searching for Meal Ideas—Get 50+ Delicious Recipes in One E-Book
Get the complete recipe e-book and discover delicious meal ideas collected in one convenient place.
Discover All 50+ Recipes- Prepare your baking sheets. Line two large baking sheets with parchment paper or a silicone baking mat. If using parchment, you can use a little bit of the batter to “glue” the corners down to the pan so it doesn’t slide around.
- Make the dry mixture. In a food processor, combine the powdered sugar, almond flour, hazelnut flour, and cocoa powder. Pulse for about 30 seconds until everything is finely ground and well combined. Sift this mixture into a large bowl, discarding any large pieces that remain.
- Make the meringue. In a completely clean, grease-free bowl of a stand mixer fitted with the whisk attachment, beat the egg whites and cream of tartar on medium speed until frothy. Gradually add the granulated sugar, a tablespoon at a time, while continuing to beat. Once all the sugar is added, increase the speed to high and beat until stiff, glossy peaks form. This is your meringue—it should look like shiny marshmallow fluff and hold a firm peak when you lift the whisk.
- Macaronage (the folding step). This is the most important step! Add about one-third of the dry ingredients to the meringue and gently fold it in with a rubber spatula. Continue adding the dry ingredients in two more additions, folding gently after each. The goal is to deflate the meringue just enough to create a smooth, flowing batter. To test if it’s ready, lift the spatula and let the batter fall back into the bowl. It should fall in a thick, ribbon-like stream and slowly settle into itself. If you draw a figure-eight in the batter, the ribbon should stay visible for about 10-15 seconds before disappearing. This is the perfect consistency.
- Pipe the macarons. Transfer the batter to a piping bag fitted with a round tip (about 1/2 inch in diameter). Hold the bag vertically about 1/2 inch above the baking sheet and pipe small, even circles, about 1.5 inches in diameter. Leave about 1.5 inches of space between each macaron to allow for spreading.
- Rest the shells. This is crucial! Firmly tap the baking sheets on the counter a few times to release any air bubbles. Then, let the piped macarons sit at room temperature for 30-60 minutes, or until a skin forms on the surface. You’ll know it’s ready when you can gently touch the top of a macaron and your finger comes away clean, without any batter sticking to it. This skin is what creates the iconic “foot” during baking.
- Bake the shells. While the shells are resting, preheat your oven to 300°F (150°C). Bake the macarons, one sheet at a time, for 15-18 minutes. To check if they are done, gently touch the top of one. It should feel firm and not wiggle around on its foot. Let them cool completely on the baking sheet before attempting to remove them.
- Make the ganache. While the shells are baking and cooling, make the filling. Place the finely chopped chocolate in a heat-safe bowl. In a small saucepan, heat the heavy cream over medium heat until it just begins to simmer. Pour the hot cream over the chocolate and let it sit for 2-3 minutes. Then, gently stir until the chocolate is completely melted and smooth. Add the softened butter, chocolate hazelnut spread, vanilla extract, and a pinch of salt. Stir until everything is glossy and well combined. Let the ganache cool and thicken to a pipeable consistency, about 15-20 minutes.
- Assemble the macarons. Once the shells are completely cool, carefully peel them off the parchment paper. Pair them up by size. Transfer the cooled ganache to a piping bag and pipe a generous dollop onto the flat side of one shell. Gently sandwich it with its matching shell, pressing lightly until the filling spreads to the edges. Repeat with the remaining shells.
- Mature in the fridge. This is the final secret to a perfect macaron! Place the assembled macarons in an airtight container and refrigerate for at least 24 hours. This allows the shells to absorb moisture from the filling, resulting in that perfect, soft, chewy interior. Bring them to room temperature for about 30 minutes before serving for the best flavor and texture.
What Makes This Recipe Special
- Quick and easy to prepare
- Packed with flavor and nutrition
- Perfect for any occasion
- Customizable to your taste preferences
- Budget-friendly ingredients
Expert Tips for Success
I’ve had my fair share of macaron mishaps, so let me save you the trouble! Here are my most important tips for getting these decadent chocolate hazelnut macarons just right.
Weigh Your Ingredients
For macarons, a kitchen scale is your best friend. The ratio of ingredients is so precise that even a few extra grams of almond flour can throw off the entire recipe. I highly recommend weighing your ingredients for consistent, reliable results every time.
Age Your Egg Whites
Separating your egg whites and leaving them in a covered bowl in the fridge for 24-48 hours helps to dry them out slightly. This extra-dry protein structure creates a much more stable meringue, which is key for tall, beautiful macarons with perfect feet.
Don’t Overmix the Batter
The macaronage step is a delicate dance. Under-mix and your batter will be too thick, resulting in pointy tops. Over-mix and it will be too runny, creating flat, cracked shells. The ribbon test is your best guide—when the batter flows like lava and the ribbon slowly dissolves, you’re there.
Let Them Rest
Don’t skip the resting period! It’s not just a suggestion; it’s essential. The skin that forms on the shell is what forces the batter to bake up and out, creating that beautiful ruffled foot. If you skip this step, your macarons will likely crack in the oven.
Variations and Substitutions
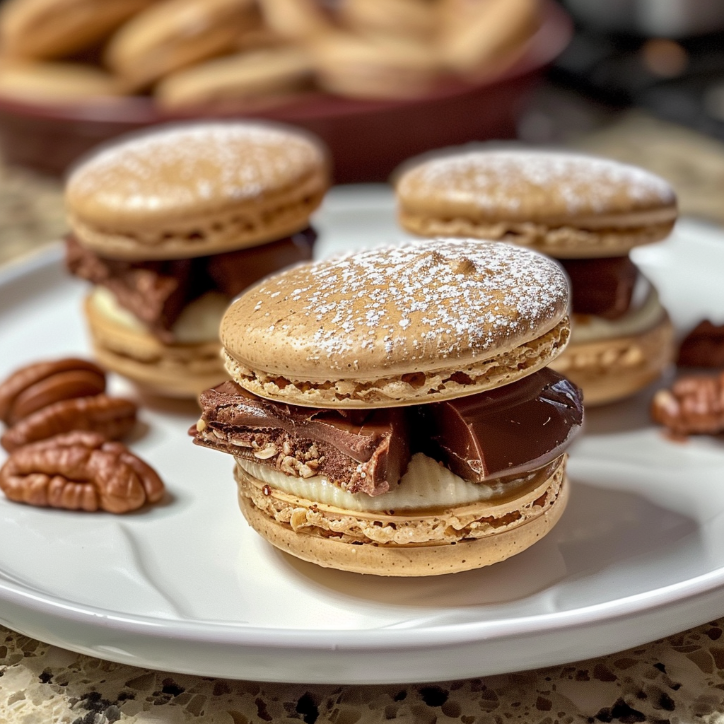
This recipe is a wonderful base for your own creative twists. Here are a few of my favorite ways to change it up.
- Nut-Free Option: To make these nut-free, you can replace the almond and hazelnut flours with an equal amount of sunflower seed flour. The flavor will be slightly different, but the texture will be just as wonderful.
- Different Fillings: While the chocolate hazelnut ganache is divine, you could also fill these with a simple chocolate buttercream, a raspberry jam, or a salted caramel sauce. Get creative!
- Add a Crunch: For a little extra texture, sprinkle some finely chopped, toasted hazelnuts on top of the ganache before sandwiching the shells together.
- Espresso Kick: Add a teaspoon of instant espresso powder to the dry ingredients for a mocha-flavored shell that pairs beautifully with the hazelnut.
Serving Suggestions
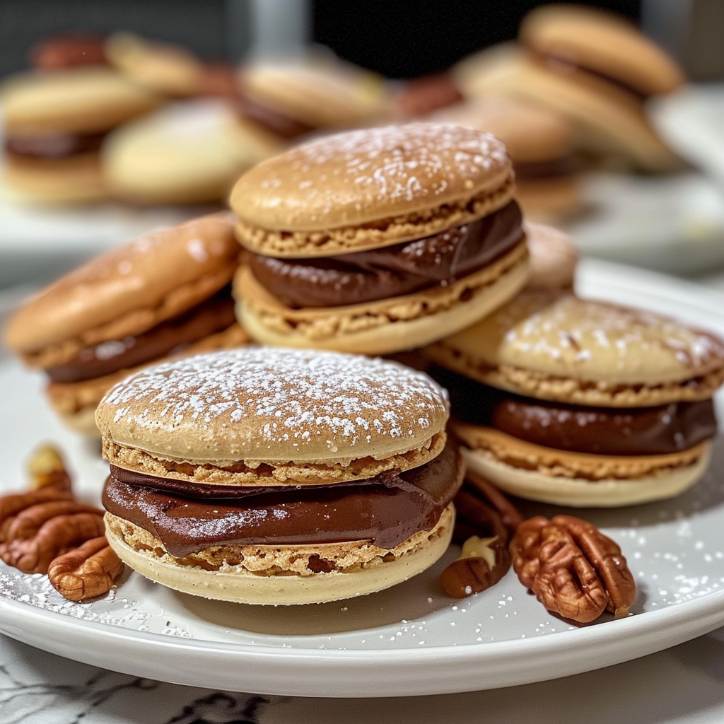
These decadent chocolate hazelnut macarons are a celebration in and of themselves. They are perfect for a special dessert platter, a bridal shower, or an afternoon tea party. I love to serve them on a beautiful cake stand with a pot of freshly brewed Earl Grey tea or a strong, rich espresso. The bitterness of the coffee or tea perfectly complements the sweetness of the macaron. For an extra indulgent touch, serve them alongside a scoop of vanilla bean ice cream or a dollop of lightly sweetened whipped cream.
FAQs
Why are my macarons cracked on top? This is usually caused by a few things: the batter was over-mixed, the shells didn’t rest long enough to form a skin, or the oven temperature was too high. Make sure to follow the resting step and use an oven thermometer to ensure accurate temperature.
Why are my macarons hollow inside? Hollow macarons are often a result of under-mixed batter or a meringue that wasn’t whipped to stiff peaks. Make sure your meringue is glossy and holds a firm peak, and don’t be afraid to fold the batter a little more until it reaches that lava-like consistency.
How do I store macarons? Store them in an airtight container in the refrigerator for up to 5 days. They actually taste even better the next day after they’ve had time to “mature.” You can also freeze them for up to 3 months in an airtight container.
Can I make the batter ahead of time? It’s best to bake the shells the same day you make the batter, as the meringue will start to deflate. However, you can make the ganache filling a day or two in advance and keep it in the fridge.
Final Thoughts
Making these decadent chocolate hazelnut macarons is more than just baking a dessert; it’s about creating a moment. It’s the joy of seeing your family’s faces light up, the pride in mastering a challenging recipe, and the simple pleasure of sharing something beautiful and delicious. I hope you’ll put on your favorite music, pour yourself a glass of something nice, and give this recipe a try. Remember, even if your first batch isn’t perfect, they’ll still be absolutely delicious. That’s the beauty of baking—it’s a journey, and every step is filled with love and flavor.
I hope you loved making these decadent chocolate hazelnut macarons—they’re rich, nutty, and taste like a little Parisian dream that makes an ordinary afternoon feel like a grand celebration. If you’re in the mood for more sweet treats from my kitchen, you absolutely have to try my Grandma’s Classic Apple Cake for a taste of pure nostalgia, or these Chewy Brown Butter Chocolate Chip Cookies that disappear in minutes. For a breakfast twist, my Fluffy Blueberry Muffins are a family favorite, and when you need a cozy dessert, this Creamy No-Bake Cheesecake is a lifesaver.
Join us on our Facebook Page and Facebook Group—and don’t forget to follow us on Pinterest for daily inspiration!
· American ·
Decadent Chocolate Hazelnut Macarons for Dinner Tonight
Delicate French macarons with rich chocolate shells and a silky, luscious chocolate hazelnut ganache filling. A truly decadent and impressive treat for any special occasion.
Keep the screen of your device on while you follow the steps.
- Line two baking sheets with parchment paper.
- Pulse powdered sugar, almond flour, hazelnut flour, and cocoa in a food processor until fine; sift into a bowl.
- Beat egg whites and cream of tartar until frothy. Gradually add sugar, beating to stiff, glossy peaks.
- Gently fold dry ingredients into the meringue until the batter flows like lava and a ribbon dissolves slowly.
- Pipe 1.5-inch circles onto prepared baking sheets, leaving space between each.
- Tap baking sheets on the counter to release air bubbles. Rest for 30-60 minutes until a skin forms.
- Bake at 300°F (150°C) for 15-18 minutes until shells are firm. Cool completely.
- Heat heavy cream until simmering. Pour over chopped chocolate; let sit 2-3 minutes, then stir until smooth.