Introduction
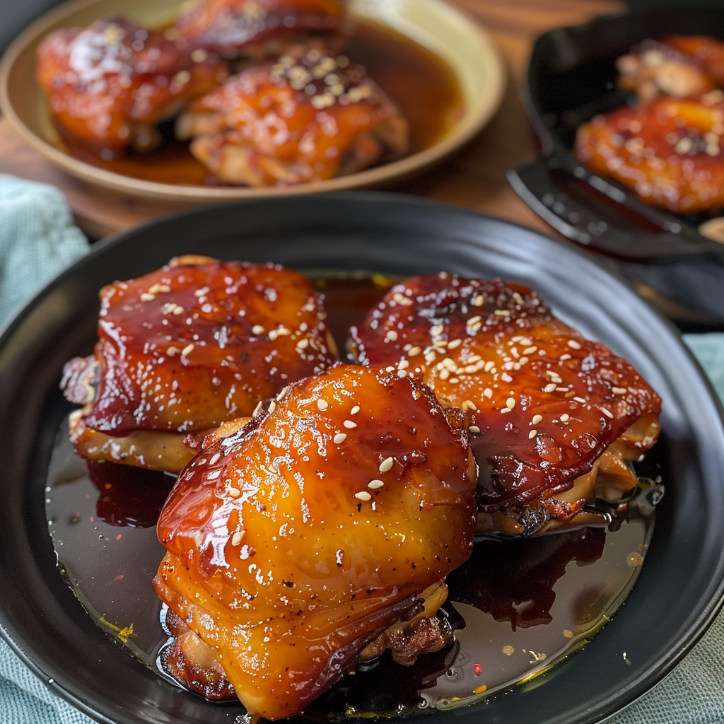
There are some dinners that just feel like a warm hug, and this recipe for sticky baked chicken thighs is exactly that. I can still picture my mom bustling around our little Chicago kitchen, the air thick with the sweet-savory aroma of dinner bubbling away on the stove. She’d always let me “help” by brushing the glossy sauce onto the chicken, a job I took far too seriously for a seven-year-old. Now, with my own husband and kids—Ella and Peter—gathered around our table, I love recreating that magic. This isn’t just dinner; it’s a little piece of my Polish-American childhood, simplified for busy weeknights but still packed with the kind of comforting, finger-licking goodness that makes everyone ask for seconds.
Why You’ll Love This Recipe
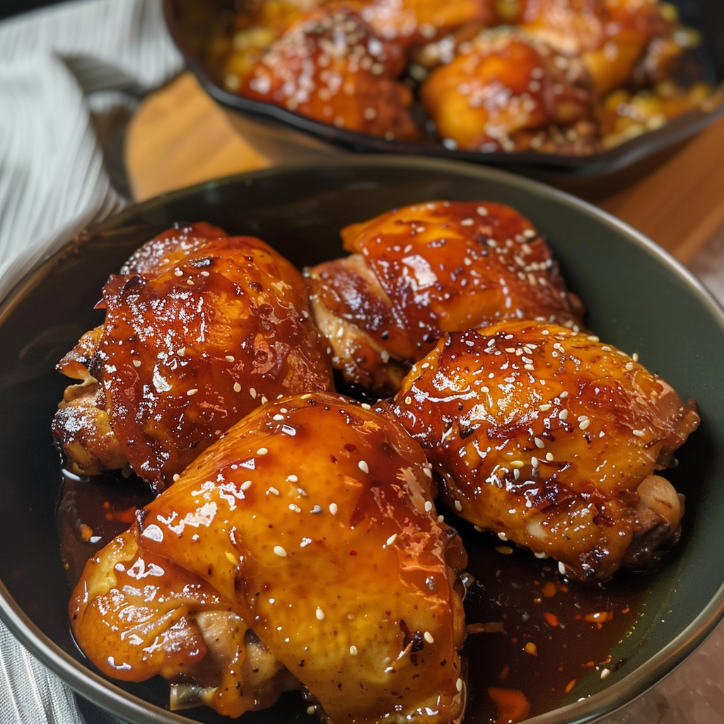
This truly is the best sticky baked chicken thighs recipe for so many reasons. It’s incredibly easy to throw together with pantry staples, making it a perfect go-to on hectic evenings. The chicken comes out unbelievably juicy and tender, with a caramelized, glossy glaze that clings to every bite. It’s a guaranteed family favorite that feels fancy enough for a Sunday dinner but is simple enough for a Tuesday, and the sweet and savory flavor profile is a hit with both kids and adults alike.
Beyond the incredible taste, this dish is wonderfully versatile and forgiving. It’s naturally gluten-free and dairy-free, making it a great option for many dietary needs. Plus, it’s a high-protein, satisfying meal that comes together with minimal fuss and even less cleanup. You get all the sticky, delicious goodness of a slow-cooked barbecue without spending hours over a hot grill—your oven does all the hard work, leaving you free to relax or whip up a simple side salad.
Ingredients
Here’s what you’ll need to create this sticky, sweet, and savory masterpiece. The sauce comes together in minutes and creates the most incredible glaze.
- 8 bone-in, skin-on chicken thighs – This is the star of the show! The bone and skin keep the meat incredibly moist and flavorful as it bakes.
- 1/2 cup low-sodium soy sauce – For that essential savory, umami backbone. You can use tamari or coconut aminos for a gluten-free or soy-free alternative.
- 1/3 cup honey – This is what gives the chicken its signature sticky sweetness. Maple syrup or brown sugar can be used as a substitute.
- 3 tablespoons ketchup – Adds a touch of tangy tomato flavor and helps thicken the sauce.
- 3 cloves garlic, minced – Because everything is better with garlic! It adds a pungent, aromatic depth.
- 1 tablespoon rice vinegar – A splash of acidity to balance the sweetness. Apple cider vinegar works perfectly too.
- 1 teaspoon sesame oil – For a subtle, nutty flavor that elevates the whole dish.
- 1/2 teaspoon ground ginger – Adds a warm, slightly spicy note that pairs beautifully with the garlic.
- 2 green onions, thinly sliced – For a fresh, vibrant garnish right before serving.
- 1 tablespoon sesame seeds – Optional, but they add a lovely crunch and visual appeal.
Step-by-Step Instructions
Let’s get to the fun part! Follow these simple steps for perfect sticky baked chicken thighs every single time.
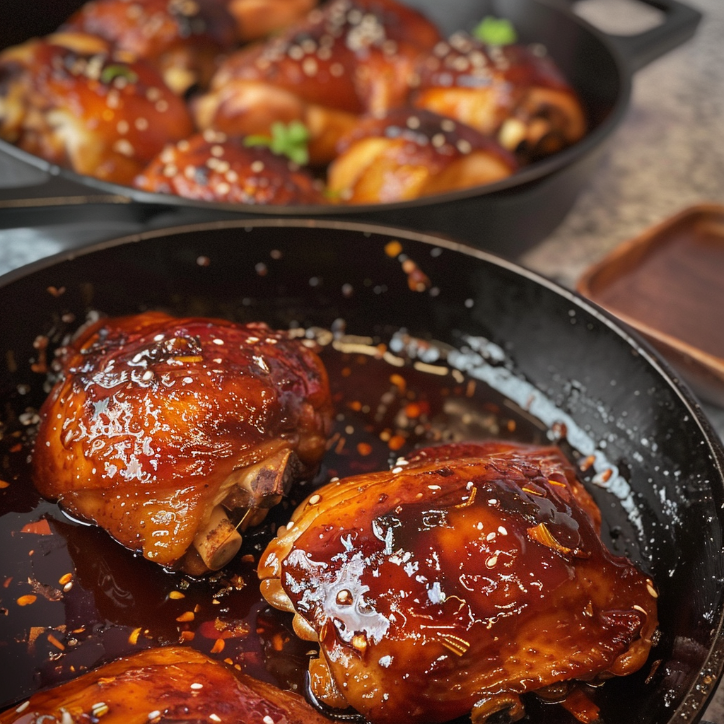
- Preheat and Prep: Preheat your oven to 400°F (200°C). Pat the chicken thighs dry with paper towels. This is a crucial step for getting crispy skin. Place them in a single layer in a large baking dish or on a rimmed baking sheet lined with foil for easy cleanup.
- Make the Sticky Sauce: In a medium bowl, whisk together the soy sauce, honey, ketchup, minced garlic, rice vinegar, sesame oil, and ground ginger until well combined.
- Coat the Chicken: Pour the sauce over the chicken thighs, turning them to ensure they are fully coated on all sides. Arrange them skin-side up in the dish.
- Bake: Place the baking dish in the preheated oven and bake for 35-40 minutes, or until the chicken is cooked through and has an internal temperature of 165°F (74°C).
- Baste for Glaze: About halfway through baking, carefully remove the dish from the oven and spoon some of the pan juices over the top of the chicken. This helps build that beautiful, sticky glaze.
- Broil for Caramelization (Optional but Recommended): For extra sticky, caramelized edges, switch your oven to broil for the last 2-3 minutes. Keep a close eye on it so it doesn’t burn!
- Rest and Serve: Once done, remove the chicken from the oven and let it rest for 5 minutes. This allows the juices to redistribute, keeping the meat tender. Garnish with sliced green onions and sesame seeds before serving.
What Makes This Recipe Special
- ✓Quick and easy to prepare
- ✓Packed with flavor and nutrition
- ✓Perfect for any occasion
- ✓Customizable to your taste preferences
- ✓Budget-friendly ingredients
Expert Tips for Success
To ensure your sticky baked chicken thighs come out perfect every time, here are a few of my top tips from years of making this dish.
YOUR COMPLETE RECIPE COLLECTION
Stop Searching for Meal Ideas—Get 50+ Delicious Recipes in One E-Book
Get the complete recipe e-book and discover delicious meal ideas collected in one convenient place.
Discover All 50+ Recipes- Don’t Skip Drying the Chicken: Patting the chicken thighs completely dry before adding the sauce is the secret to getting nicely rendered, slightly crisp skin. Excess moisture will just steam the chicken.
- Use a Meat Thermometer: Chicken is done when it reaches 165°F (74°C) in the thickest part, not touching the bone. This is the best way to guarantee juicy, perfectly cooked meat without any guesswork.
- Watch the Broiler: The broiler is your best friend for that final caramelized touch, but it can go from perfect to burnt in seconds. Stay close to the oven and keep an eye on it during those last few minutes.
Variations and Substitutions
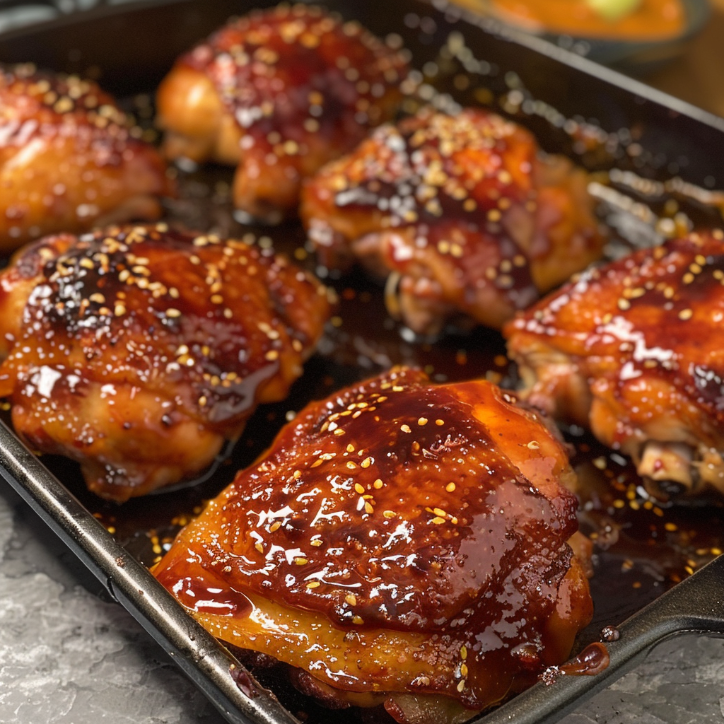
This recipe is a fantastic base for getting creative. Here are a few of my favorite ways to switch it up.
- Spicy Kick: Add 1-2 teaspoons of sriracha, a pinch of red pepper flakes, or a dash of your favorite hot sauce to the sauce mixture for a sweet-and-spicy version that my husband absolutely loves.
- Citrusy Twist: Swap the rice vinegar for fresh orange juice and add a teaspoon of orange zest to the sauce. This gives the dish a bright, zesty flavor that’s perfect for summer.
- Bourbon Glaze: For an adult-only version, replace the rice vinegar with 2 tablespoons of bourbon. The bourbon adds a rich, smoky depth that pairs wonderfully with the honey and soy.
Serving Suggestions
These sticky baked chicken thighs are incredibly versatile and pair well with so many things. For a complete meal, I love serving them over a bed of fluffy white rice or steamed jasmine rice to soak up all that incredible sauce. A side of roasted broccoli, green beans, or a crisp cucumber salad adds a fresh, crunchy contrast to the rich, sticky chicken.
You can also shred the leftover chicken and use it in tacos, salads, or rice bowls for an easy lunch the next day. For a fun family-style dinner, serve the chicken right in the baking dish with a big bowl of mashed potatoes and some buttery corn on the side—it’s pure comfort food heaven.
FAQs
Can I use boneless, skinless chicken thighs?
Absolutely! Boneless, skinless thighs will work, but you’ll need to reduce the baking time to about 25-30 minutes, or until they reach 165°F. They won’t have the crispy skin, but they’ll still be juicy and delicious.
How do I store and reheat leftovers?
Store any leftover sticky baked chicken thighs in an airtight container in the refrigerator for up to 4 days. To reheat, place them in a baking dish with a little extra sauce or water, cover with foil, and warm in a 350°F oven until heated through. You can also reheat them in the microwave, but the oven will help maintain the texture.
Can I make this recipe in a slow cooker?
Yes, you can! Place the chicken and sauce in a slow cooker and cook on low for 4-6 hours or on high for 2-3 hours. For a thicker, stickier sauce, remove the chicken and simmer the sauce on the stovetop for a few minutes to reduce it, or transfer the sauce to a small saucepan and whisk in a cornstarch slurry (1 tablespoon cornstarch mixed with 2 tablespoons water).
Final Thoughts
I truly hope you love this recipe for sticky baked chicken thighs as much as my family does. It’s one of those dishes that brings everyone to the table with a smile, and it’s so simple to make that you’ll find yourself turning to it again and again. It’s the perfect blend of sweet, savory, and sticky, and it’s guaranteed to become a new favorite in your home. So preheat that oven, gather your ingredients, and get ready to enjoy a meal that tastes like love.
I hope you love making these sticky baked chicken thighs—they’re sweet, savory, and so delicious that getting everyone to the dinner table feels like a win. If you’re looking for more comforting family meals, be sure to check out my Creamy Tuscan Chicken Pasta, this Easy One-Pot Lemon Herb Chicken and Rice, or these Slow Cooker BBQ Pulled Chicken Sandwiches for another set-it-and-forget-it dinner idea.
Join us on our Facebook Page and Facebook Group—and don’t forget to follow us on Pinterest for daily inspiration!
· American ·
Sticky Baked Chicken Thighs: Easy & Delicious
These sticky baked chicken thighs are the ultimate easy weeknight dinner, featuring juicy, tender meat coated in a sweet and savory caramelized glaze. A simple pantry-staple sauce creates a glossy, finger-licking finish that the whole family will love.
Keep the screen of your device on while you follow the steps.
- Preheat oven to 400°F (200°C). Pat chicken thighs dry and place in a baking dish.
- Whisk together soy sauce, honey, ketchup, garlic, rice vinegar, sesame oil, and ginger.
- Pour sauce over chicken, turning to coat. Arrange skin-side up.
- Bake for 35-40 minutes, basting halfway through, until internal temperature reaches 165°F (74°C).
- Optional: Broil for 2-3 minutes for extra caramelization.
- Rest for 5 minutes, then garnish with green onions and sesame seeds before serving.