Introduction
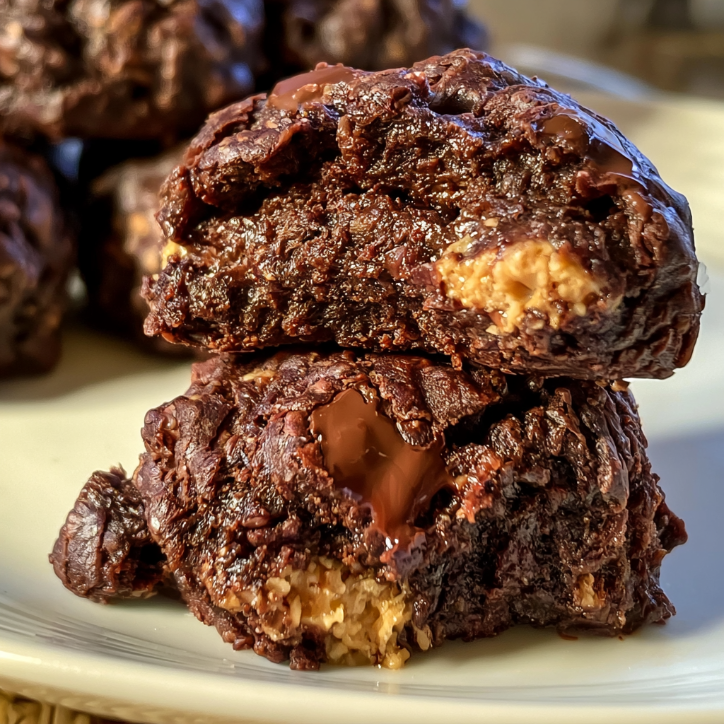
Growing up in Chicago with Polish roots, my babcia’s kitchen was my first classroom, and the smell of butter, chocolate, and warm dough still takes me right back to those golden afternoons. I can still see my mother’s hands dusted with flour and hear my grandmother Elizabeth humming while she pulled her famous apple cake from the oven. But this recipe, my friends, is pure American comfort with a twist that makes my kids Ella and Peter do a happy dance every single time. There’s something magical about the combination of rich, melty chocolate and creamy, salty peanut butter, especially when it’s baked into a soft, chewy treat that fills the whole house with an irresistible aroma. This is the recipe I turn to when I need a guaranteed smile, a cozy moment, and a dessert that disappears faster than I can plate it.
Why You’ll Love This Recipe
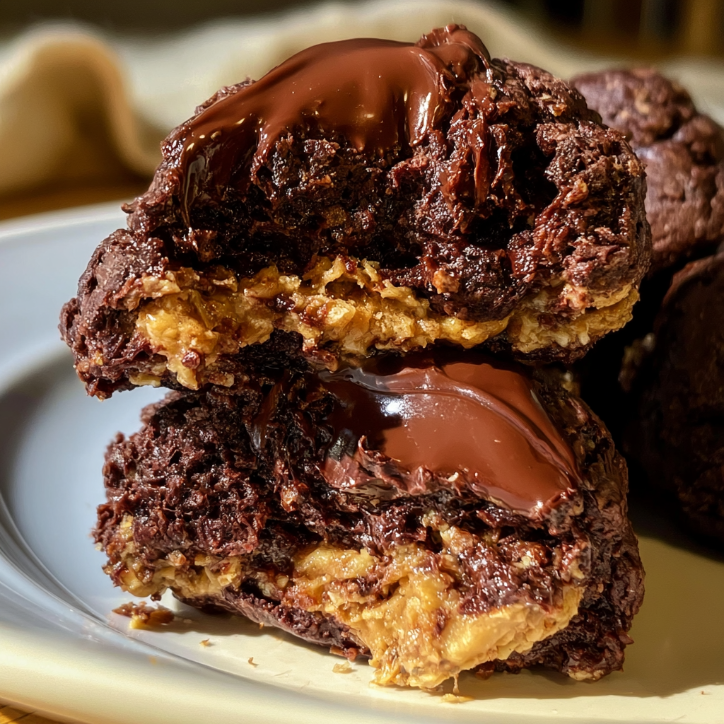
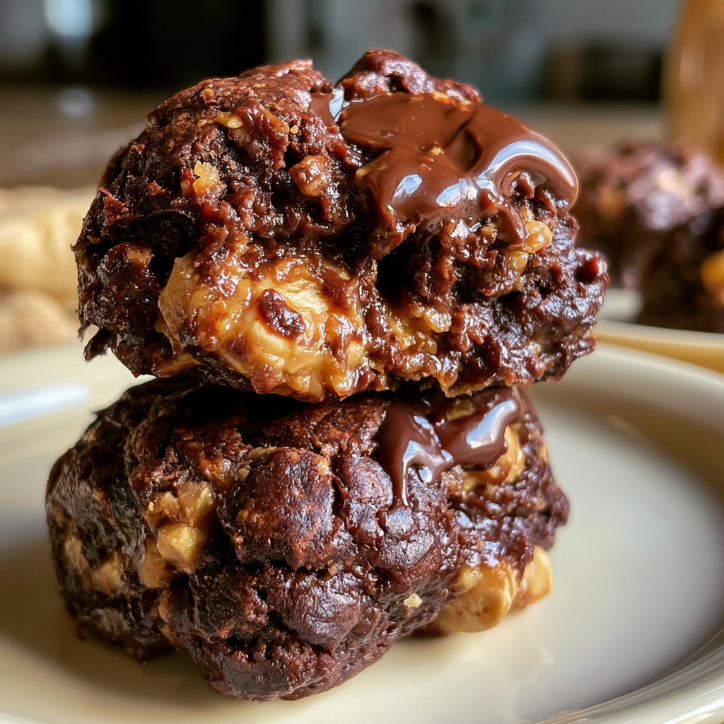
This is the ultimate no-fuss dessert that delivers bakery-quality results with simple pantry staples. It’s incredibly easy to throw together, requiring just one bowl and about ten minutes of hands-on prep, making it perfect for busy weeknights or last-minute gatherings. The texture is pure perfection—a soft, fudgy center with slightly crisp edges, loaded with melty chocolate chunks and swirls of creamy peanut butter. It’s the kind of treat that feels indulgent and special, yet it’s approachable enough for beginner bakers and always a crowd-pleaser at family dinners, potlucks, or school bake sales.
Beyond the incredible taste, this recipe is wonderfully versatile and family-friendly. You can easily adapt it to be gluten-free by swapping in your favorite gluten-free flour blend, or make it dairy-free with plant-based butter and chocolate. It’s a dessert that brings people together, sparking joy with every gooey, chocolatey, peanut-buttery bite. Plus, it stores beautifully, meaning you can bake a batch on Sunday and enjoy it all week long—if it lasts that long in your house, of course!
Ingredients
Here’s everything you’ll need to create this heavenly bake chocolate peanut butter creation. I’ve included some notes to help you get the best results.
- 1 ½ cups all-purpose flour – Spoon and level it for the perfect texture. For a gluten-free version, use a 1:1 gluten-free baking blend.
- 1 teaspoon baking powder – This helps the bars rise just slightly for a soft, tender crumb.
- ½ teaspoon salt – Balances the sweetness and enhances the chocolate and peanut butter flavors.
- ¾ cup unsalted butter, melted – Use good-quality butter for the richest flavor. Salted butter works too—just reduce the added salt to ¼ teaspoon.
- 1 cup light brown sugar, packed – Adds moisture and a deep, caramel-like sweetness.
- ½ cup granulated sugar – For sweetness and to help create those crispy edges.
- 2 large eggs, at room temperature – They bind everything together and add richness.
- 2 teaspoons vanilla extract – Pure vanilla makes a world of difference.
- 1 cup semi-sweet chocolate chips – Or use chopped dark chocolate bars for melty pools of chocolate.
- ½ cup creamy peanut butter – For swirling. Use a good-quality brand that’s smooth and drippy, not too stiff.
- Optional: ½ cup chopped peanuts – For extra crunch and a beautiful presentation.
Step-by-Step Instructions
Let’s get baking! Follow these simple steps, and you’ll have a pan of pure bliss in no time.
- Preheat and prep: Preheat your oven to 350°F (175°C). Line an 8×8-inch baking pan with parchment paper, leaving some overhang on two sides for easy lifting.
- Mix the dry ingredients: In a medium bowl, whisk together the flour, baking powder, and salt. Set this aside while you work on the wet ingredients.
- Combine the wet ingredients: In a large bowl, whisk the melted butter, brown sugar, and granulated sugar together until well combined and smooth. The mixture should look glossy.
- Add eggs and vanilla: Beat in the eggs one at a time, mixing well after each addition. Stir in the vanilla extract until everything is fully incorporated.
- Combine wet and dry: Pour the dry ingredients into the wet mixture and gently fold everything together with a spatula until just combined. Be careful not to overmix, or the bars will be tough.
- Add the chocolate: Gently fold in the chocolate chips, reserving a handful to sprinkle on top if you like.
- Assemble the pan: Pour the thick batter into your prepared pan and spread it into an even layer using a spatula.
- Add the peanut butter: Dollop the creamy peanut butter over the top of the batter. Use a knife or toothpick to gently swirl it into the batter, creating beautiful marbled patterns. Don’t over-swirl; you want distinct ribbons of peanut butter.
- Bake to perfection: Bake for 30-35 minutes, or until the edges are set and golden brown and the center is just slightly soft. A toothpick inserted into the center should come out with a few moist crumbs, not wet batter.
- Cool and serve: Let the bars cool completely in the pan on a wire rack. Once cool, use the parchment paper to lift them out, slice into squares, and enjoy!
What Makes This Recipe Special
- ✓Quick and easy to prepare
- ✓Packed with flavor and nutrition
- ✓Perfect for any occasion
- ✓Customizable to your taste preferences
- ✓Budget-friendly ingredients
Expert Tips for Success
To ensure your bake chocolate peanut butter bars come out perfectly every time, here are my top three secrets. First, don’t overmix the batter! Once you add the flour, mix just until it disappears. Overmixing develops gluten, which will make your bars dense and tough instead of soft and fudgy. Second, use room-temperature eggs. Cold eggs can seize the melted butter, resulting in a lumpy batter. Let them sit on the counter for 30 minutes before you start. Finally, keep an eye on the bake time. Ovens vary, so start checking at the 28-minute mark. The center should look slightly underdone when you pull them out—they’ll continue to set as they cool, giving you that perfect fudgy texture.

YOUR COMPLETE RECIPE COLLECTION
Stop Searching for Meal Ideas—Get 50+ Delicious Recipes in One E-Book
Get the complete recipe e-book and discover delicious meal ideas collected in one convenient place.
Discover All 50+ Recipes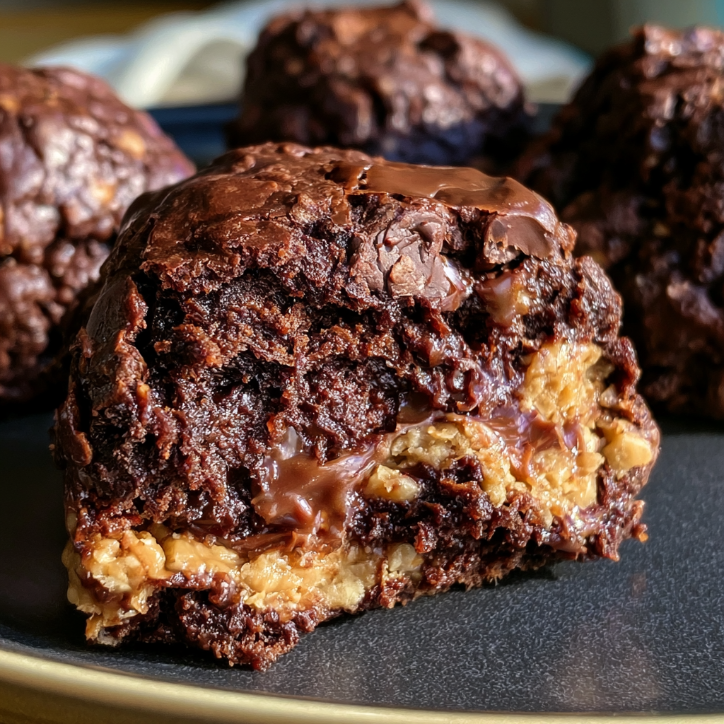
Variations and Substitutions
This recipe is wonderfully adaptable, so feel free to make it your own! For a peanut butter explosion, swap the chocolate chips for peanut butter chips and add a handful of chopped roasted peanuts to the batter. If you’re a fan of salty-sweet combos, sprinkle a little flaky sea salt on top right after baking—it takes these bars to a whole new level. And for a chocolate lover’s dream, use dark chocolate chunks and swirl in a tablespoon of chocolate hazelnut spread along with the peanut butter for an extra-decadent treat.
Serving Suggestions
These bars are absolutely delicious on their own, but they’re even better with a scoop of vanilla bean ice cream or a drizzle of warm caramel sauce. For a cozy dessert, serve them slightly warm with a glass of cold milk or a hot cup of coffee. They’re also fantastic for packing into lunchboxes, bringing to picnics, or gifting to neighbors in a pretty tin. However you serve them, they’re guaranteed to be the star of the show.
FAQs
Can I use crunchy peanut butter instead of creamy?
Absolutely! Crunchy peanut butter will add a lovely textural contrast and a bit of extra peanut flavor. Just keep in mind that it might be a little harder to swirl, but that’s part of its rustic charm.
How should I store these peanut butter chocolate bars?
Store them in an airtight container at room temperature for up to 4 days. For longer storage, you can freeze them for up to 3 months. Just wrap them tightly in plastic wrap and then foil, and thaw at room temperature when you’re ready to enjoy them.
Can I make this recipe in a 9×13-inch pan?
Yes, you can! Simply double all of the ingredients and bake in a greased 9×13-inch pan. The bake time will be similar, but start checking around the 30-minute mark. These will be slightly thinner but just as delicious.
Final Thoughts
I truly hope you love this bake chocolate peanut butter recipe as much as my family does. It’s one of those simple, comforting desserts that feels like a warm hug, and I love that it brings a little bit of my Chicago kitchen into yours. Whether you’re baking it for a special occasion or just because it’s Tuesday, these bars are pure joy. So preheat that oven, get the kids involved, and don’t forget to save a piece for yourself—you deserve it!
I hope you loved making these Chocolate Peanut Butter Swirl Bars—they’re rich, gooey, and taste like a celebration that makes any ordinary day feel completely special. If you’re craving more comforting treats, you should definitely try my Chewy Chocolate Chip Cookies for a classic favorite, or these Fudgy Brownies that are pure chocolate heaven. For something a little different, these Peanut Butter Oatmeal Bars are a fantastic breakfast-adjacent treat, and my No-Bake Peanut Butter Pie is perfect for hot summer days when you don’t want to turn on the oven.
Join us on our Facebook Page and Facebook Group—and don’t forget to follow us on Pinterest for daily inspiration!
· American ·
Bake Chocolate Peanut Butter: A Family Favorite
Rich, fudgy chocolate bars swirled with creamy peanut butter for the ultimate indulgent treat. An easy one-bowl dessert that's perfect for any occasion.
Keep the screen of your device on while you follow the steps.
- Preheat oven to 350°F (175°C) and line an 8×8-inch pan with parchment paper.
- Whisk together flour, baking powder, and salt in a medium bowl.
- In a large bowl, whisk melted butter, brown sugar, and granulated sugar until smooth.
- Beat in eggs one at a time, then stir in vanilla extract.
- Fold dry ingredients into wet mixture until just combined.
- Gently fold in chocolate chips.
- Pour batter into prepared pan and spread evenly.
- Dollop peanut butter on top and swirl with a knife.